Rancher Versions 2.0 and Later
Step 1: Prepare Rancher
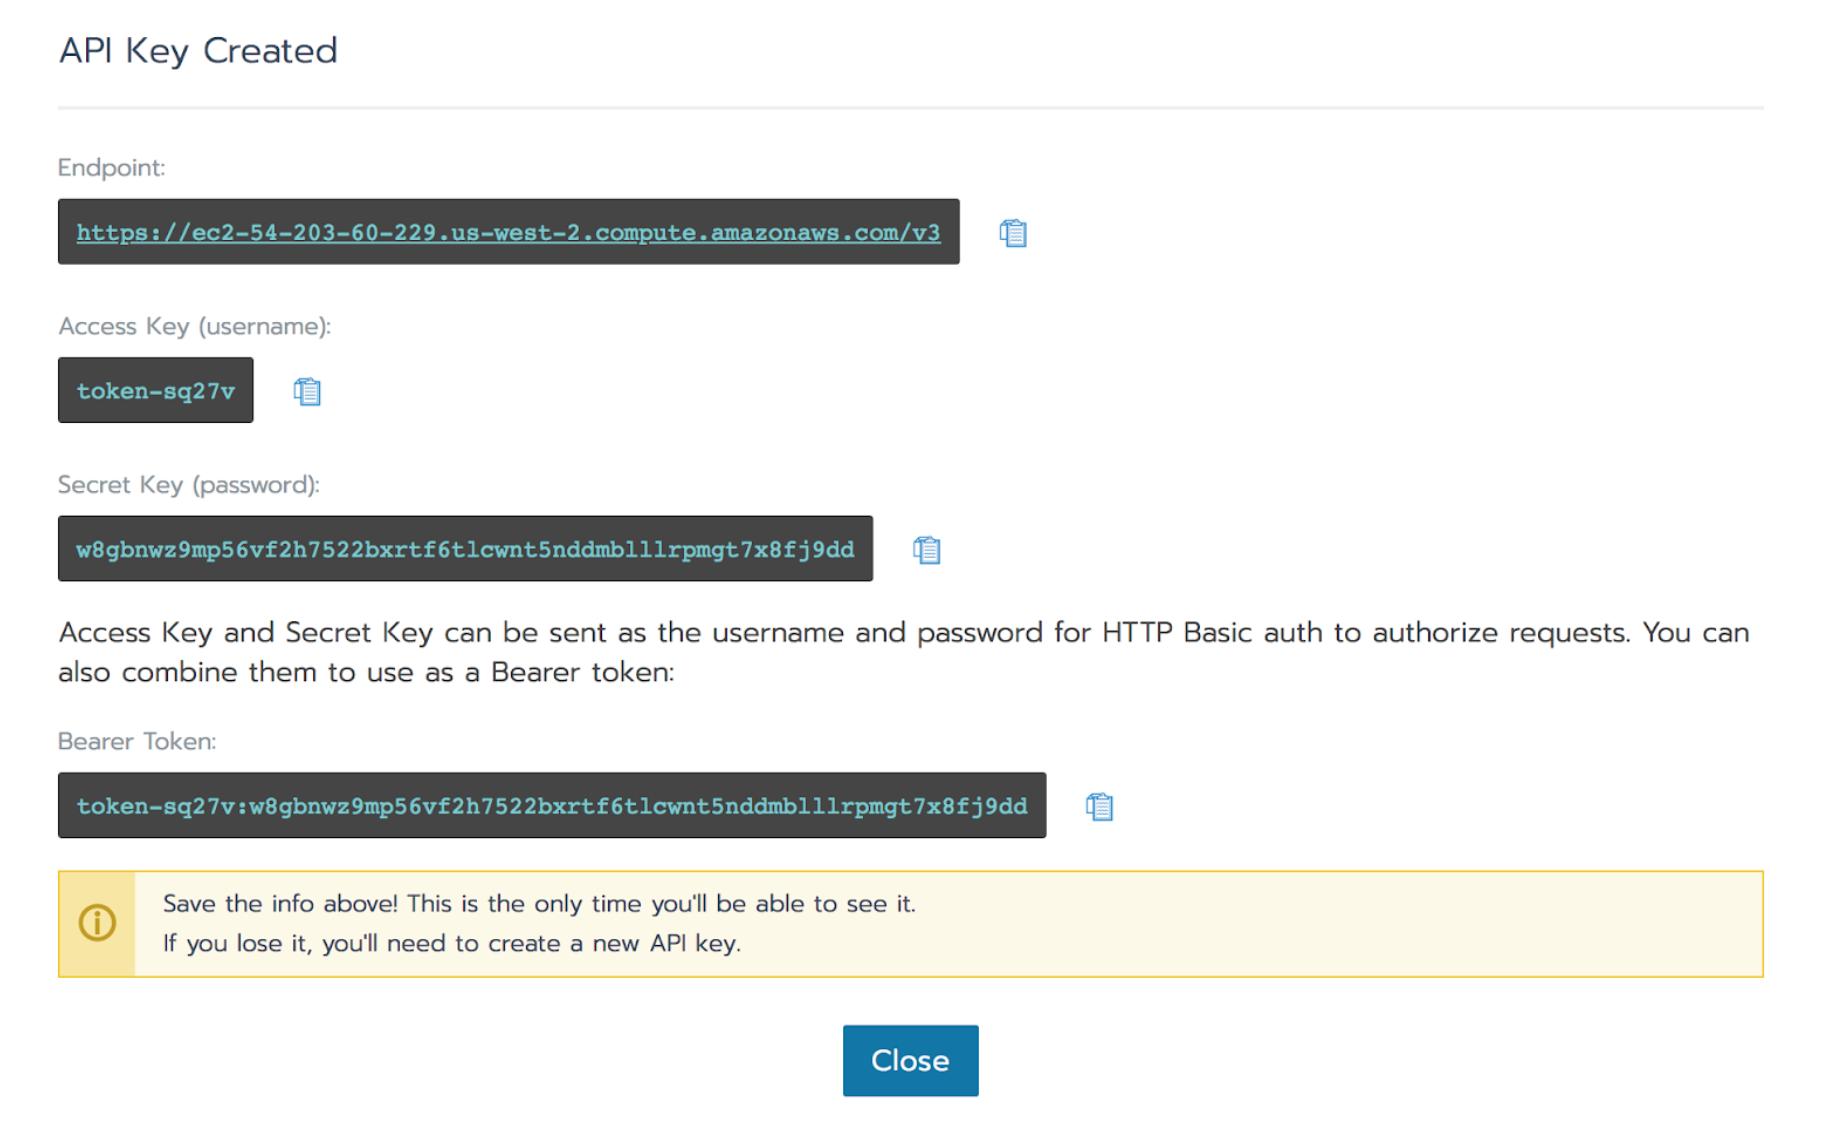
Create an Environment API Key
- Perform the steps on the Rancher API Keys page.
- Save the access and secret keys for use in the Elastigroup configuration.
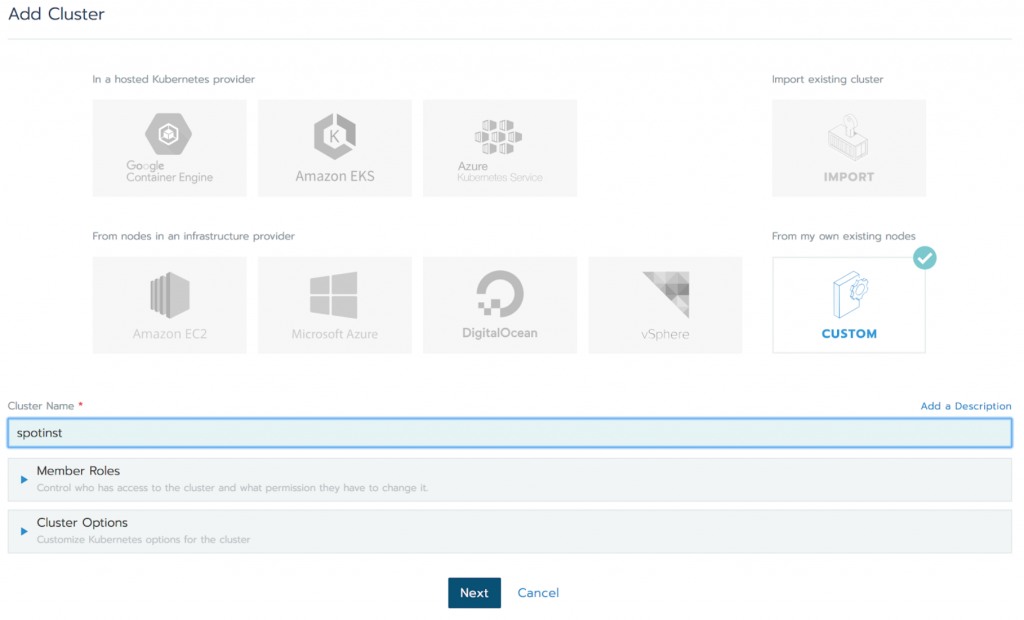
Add Custom Hosts
-
Spot integrates with Rancher 2.0 through the custom cluster configuration.
-
Once Custom is selected copy and save the registration command used to add new workers to the cluster. This will be used later to build the instance userData.
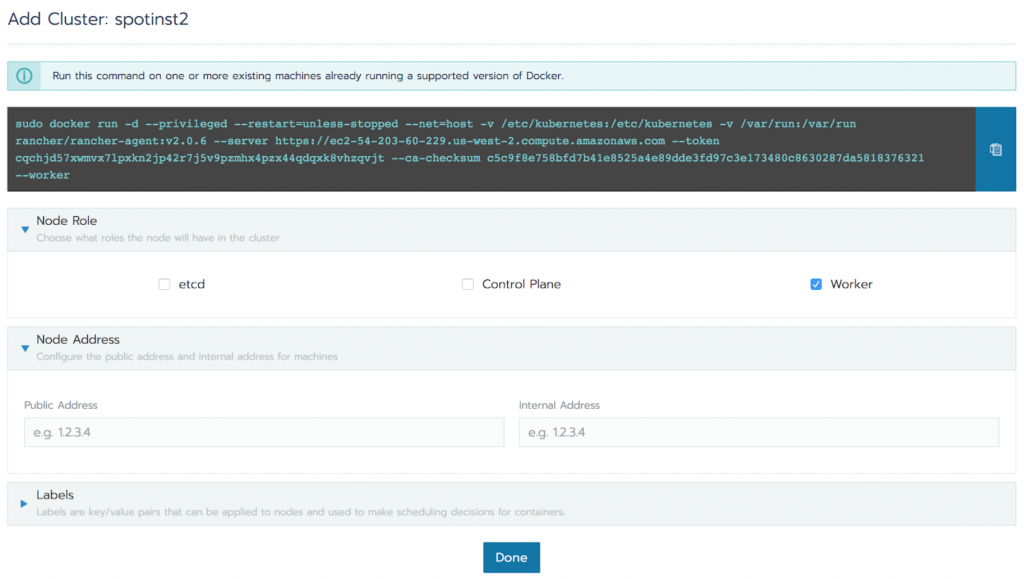
If clusters already have existing nodes, you can click on Nodes and in Edit Cluster copy the docker command for Custom Worker Nodes.
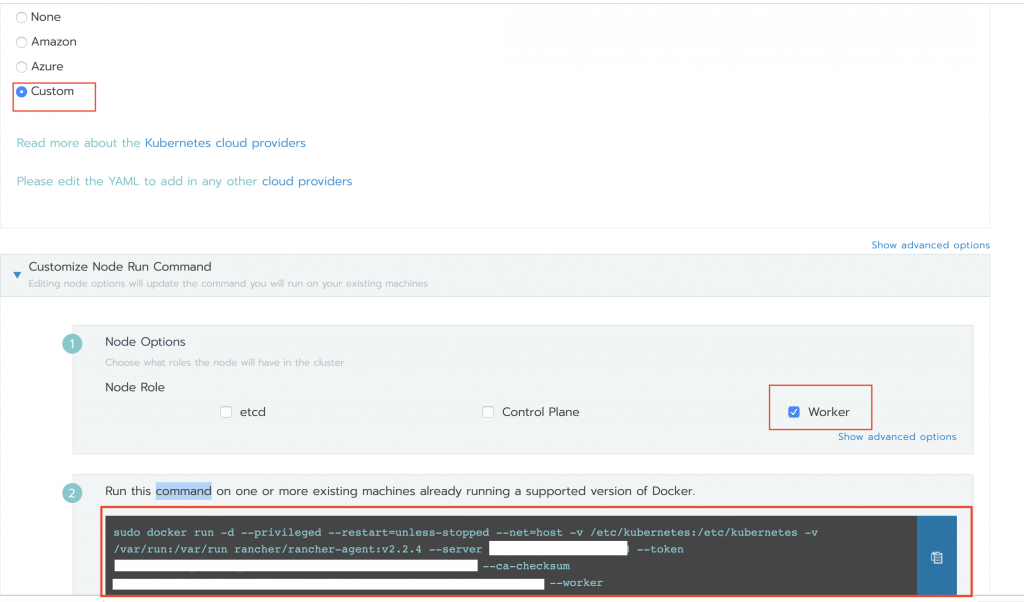
The docker command will be used to construct Elastigroup user data.
Step 2: Create an Elastigroup
Add User Data
From the registration command that was saved when creating a custom cluster, fill in the <> below with the rancher URL, token and checksum.
This will create an instance running Rancher OS with a Rancher Labs supported version of docker. For AWS, it will also add a label identifying the instance ID of the worker.
#cloud-config
rancher:
  docker:
    engine: docker-17.03.2-ce
write_files:
  - path: /etc/rc.local
    permissions: "0755"
    owner: root
    content: |
      #!/bin/bash
      wait-for-docker
      docker pull rancher/curl
      docker run -d --privileged --restart=unless-stopped --net=host -v /etc/kubernetes:/etc/kubernetes -v /var/run:/var/run rancher/rancher-agent:v2.0.6 --server <RANCHER_URL> --token <TOKEN> --ca-checksum <CHECKSUM> --worker --label spotinst.instanceId=$(docker run rancher/curl http://169.254.169.254/latest/meta-data/instance-id)
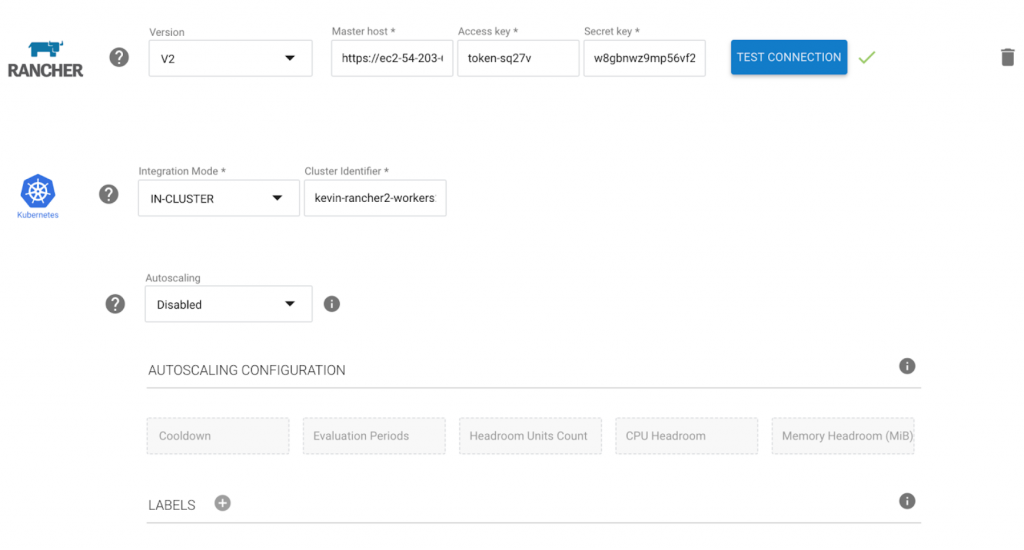
Step 3: Rancher Integration
Once the userData is set, the next step is to configure the Rancher 2.0 Elastigroup integration. For Rancher 2.0+ Elastigroup needs to integrate with both the Rancher primary server as well as the underlying Kubernetes cluster.
For Rancher enter:
- Host: URL to the host of the Rancher 2.0 primary. Remove any path or trailing forward slash. Example: https://myrancherhost.com
- Access Key: copied from key creation above
- Secret Key: copied from key creation above
For k8s enter:
- Integration Mode: IN-CLUSTER
- Cluster Identifier: A unique name that can be the same as the Elastigroup name. This will be used in the final step.
- Autoscaling: We highly recommend Automatic Autoscaling.
Step 4: Deploy the Ocean Controller
Last, follow these steps to deploy Spot's Controller in the Kubernetes cluster. Once this is deployed Spot scales and manages Kubernetes nodes, and interacts with Rancher to ensure that available and cordoned instances are rolled and cleaned correctly.
Until this step is complete, warnings for both the Controller and Rancher will be displayed in the Elastigroup Console.
Installing the Ocean Controller requires the following:
- Spot Token: Generated from the Spot Console
- Spot Account ID: Can be retrieved from the Console
- Cluster Identifier: Created in the previous step