Elastic MapReduce: Create a New EMR Cluster
In this tutorial, you will learn how to create an Elastic MapReduce (EMR) cluster in an Elastigroup.
Amazon EMR provides a managed big data framework that enables you to easily add and remove cluster capacity to meet your analysis requirements. EMR supports Hadoop, Apache Spark and other popular distributed frameworks. Running your EMR clusters on Elastigroup provides you with significant discounts due to the fact that Elastigroup leverages spot instances while maintaining 100% availability. Elastigroup also enables you to create your EMR cluster with Elastigroup, significantly increasing your potential savings.
This tutorial focuses on creating an EMR cluster from scratch and integrating it into Elastigroup. If you already run an EMR cluster on AWS, you can import the cluster to Elastigroup by either wrapping your existing cluster with spot instance task nodes or cloning the cluster to an Elastigroup.
Prerequisites
- A verified Spot account
- AWS Key Pair
Get Started
-
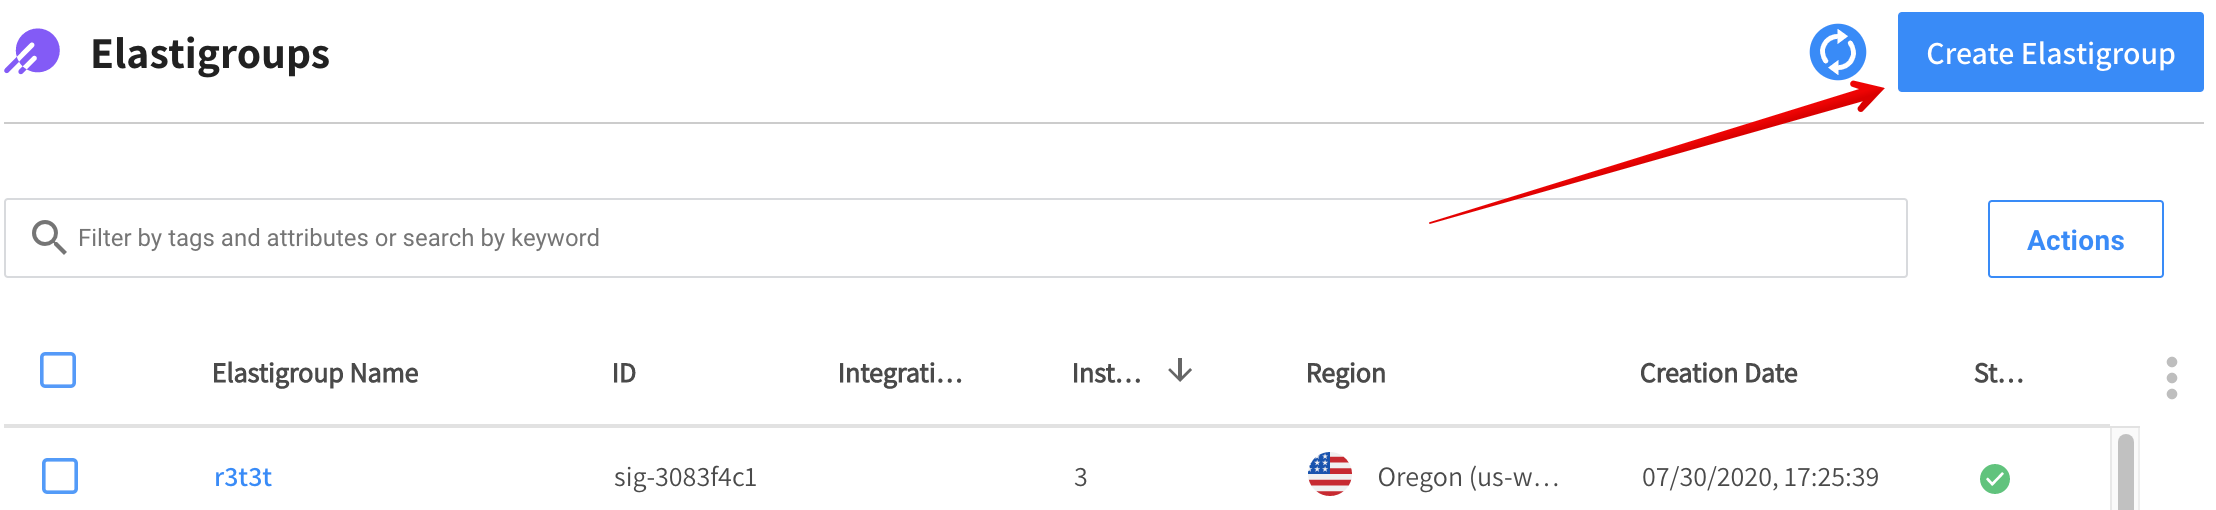
In the left menu of the Spot console, click Elastigroup/Groups, and click Create Elastigroup.
-
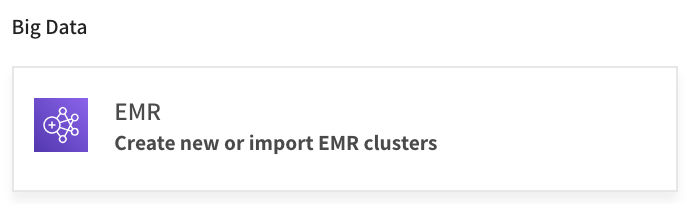
In the Use Cases page, click EMR.
-
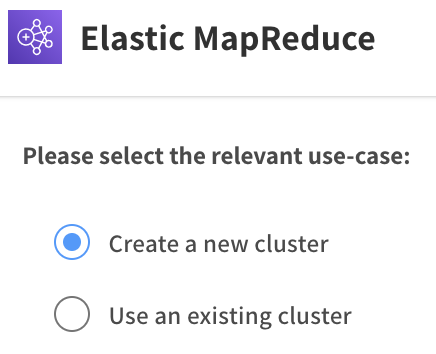
Choose Create a New Cluster, and click Select.
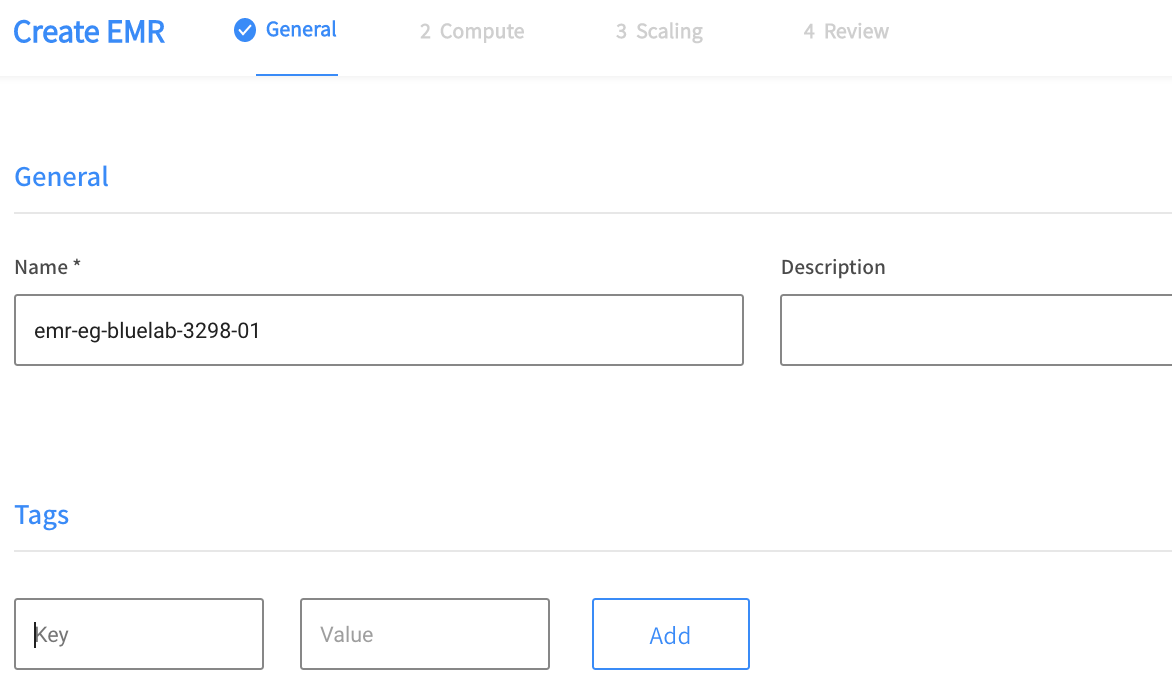
Step 1: General
- On the General page, enter the following information:
- Name: The name of your Elastigroup
- Description: A few words describing the purpose of the Elastigroup
- Tags: Key and value pairs of any tags you want to give to the group
- Click Next
Step 2: Compute
Enter the Compute settings as described below and then click Next.
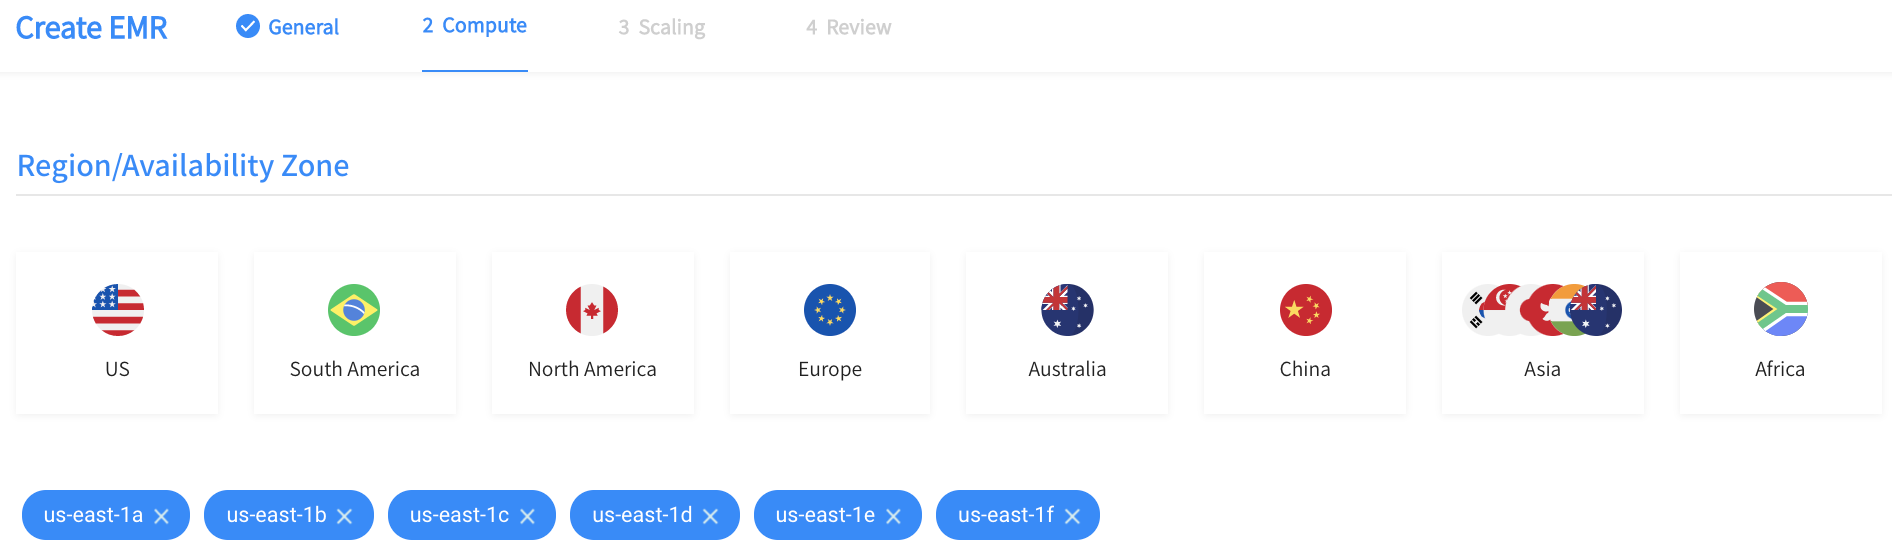
Region/Availability Zone
- Region: Click on the AWS region for the Elastigroup.
- Availability Zone: Choose one or more availability zones (AZs) in the dropdown for the chosen region.
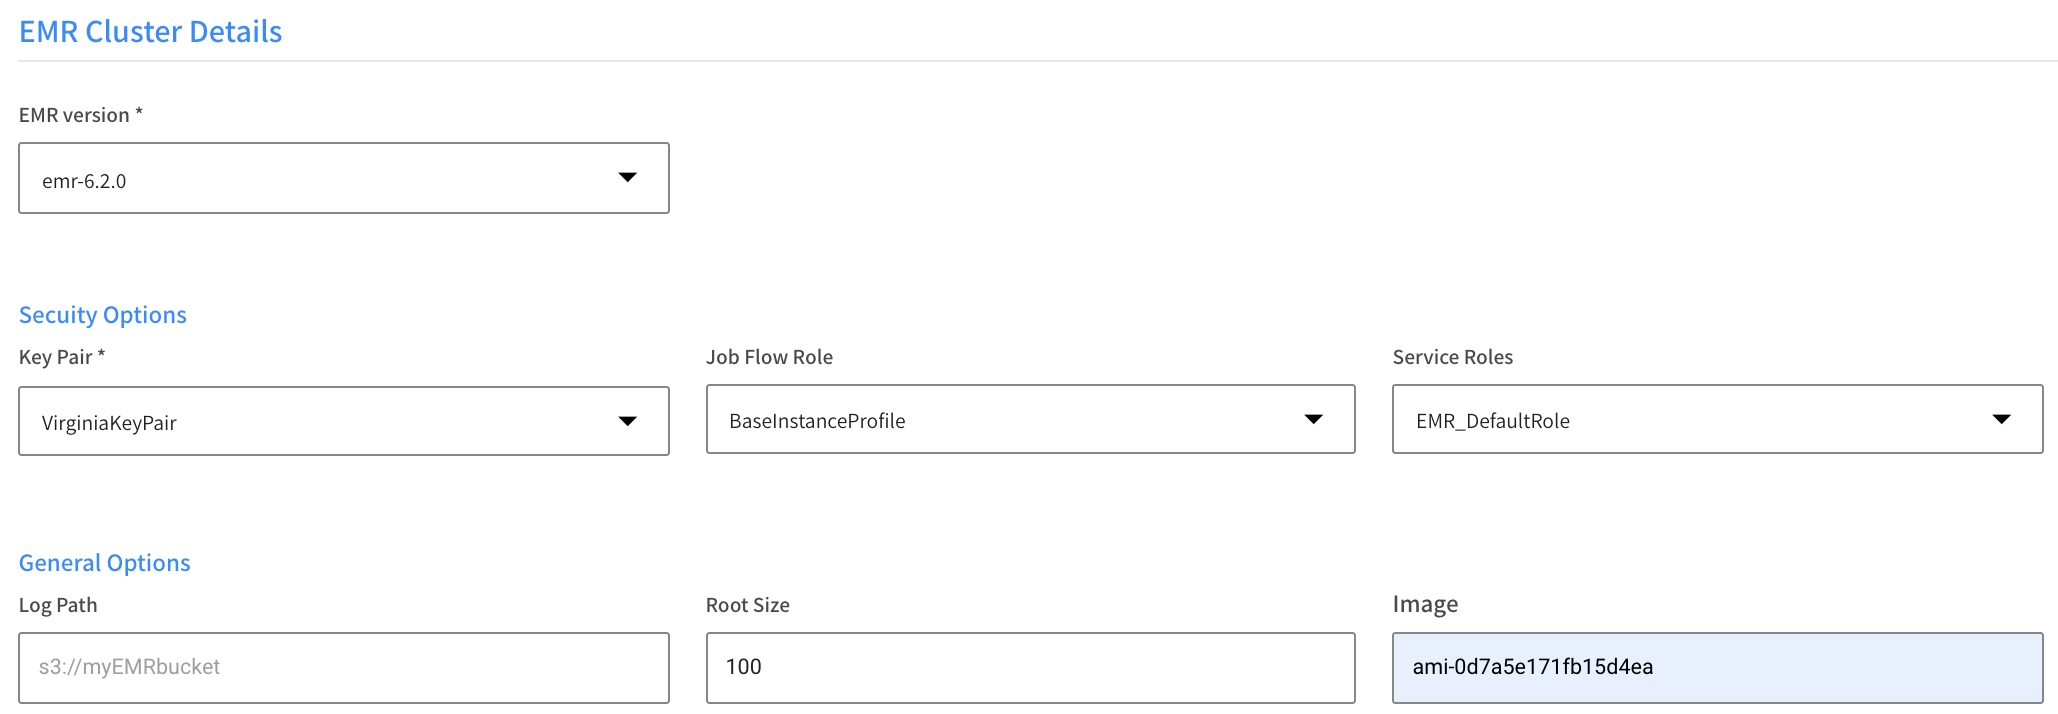
EMR Cluster Details
- EMR Version: Choose the version to use from the dropdown list.
- Security Options
- Key Pair
- Job Flow Role
- Service Roles
- General Options
- Log Path: Enter the path for the cluster logs in the format of an Amazon S3 location.
- Root Size: Set the size for the EBS volume in GB
- Image: Enter the ID for a custom AWS EBS-backed linux AMI in case the cluster uses custom AMI.
Network
- VPC: Choose a VPC from the dropdown list.
- Subnets: Choose one or more subnets from the dropdown list.
- Security Groups
- Primary Security Group: Choose a primary security group from the dropdown list.
- Core & Task Security Group: Choose a core and task security group from the dropdown list.
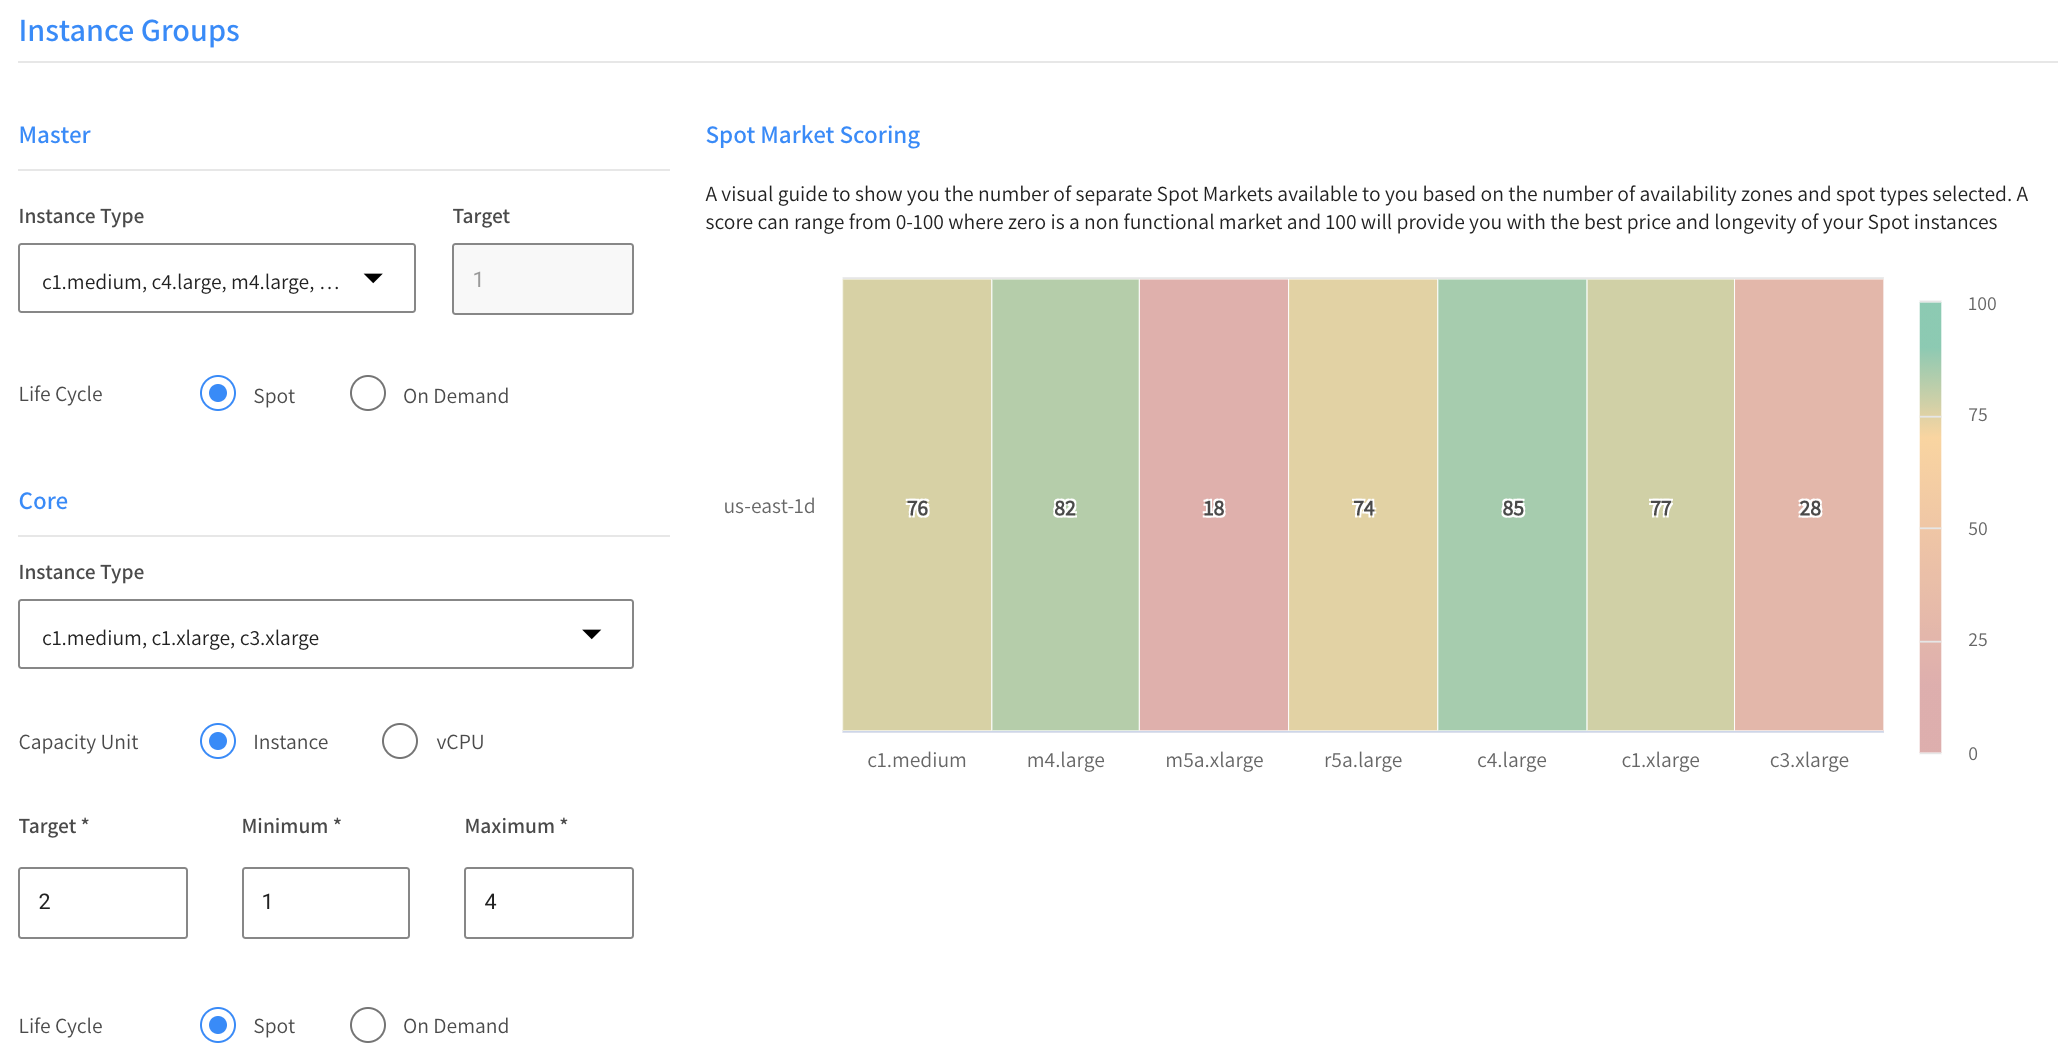
Instance Groups
Primary
- Instance Type: Choose one or more instance types from the dropdown list. Elastigroup will consider these types first when looking for an instance to bring up.
- Target: The default is one instance for the primary node. If you need multiple instances for the primary node, see the instructions below.
- Life Cycle: Choose Spot or On Demand.
Add Multiple Primary Nodes
If you need to use multiple primary nodes, you can configure this in the JSON configuration in the Review tab. Do this after you have finished filling out all the other tabs.
The following conditions apply:
- EC2 cannot be Classic.
- The EMR version must be 5.23.0 or higher.
- You can use one or three primary nodes. These are the only valid options.
- The number of primary nodes is not editable. You can set it only when you create the cluster (using the UI or the API).
- When using multiple primary nodes, all of them must have Life Cycle as On Demand.
- It is recommended to set terminationProtection to false in order terminate a multiple primary node cluster after the EG is deleted. (This is not required for a single primary node cluster.)
Do the following:
-
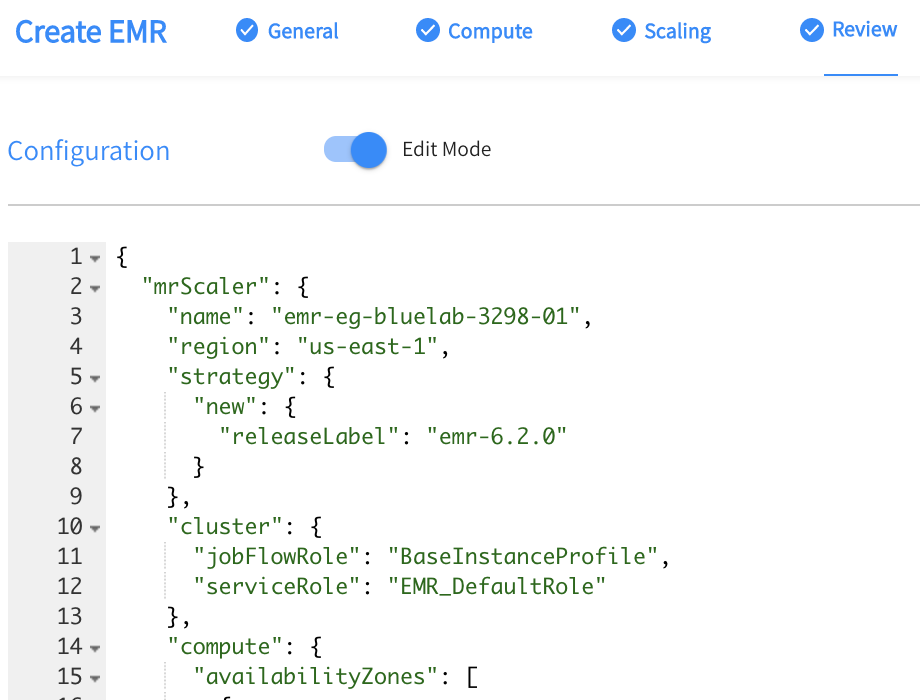
After you have entered all the information in the Compute and Scaling tabs, go to the Review tab JSON view and click Edit Mode.
-
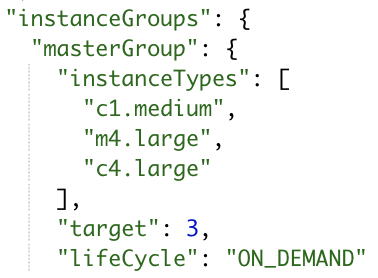
Under the attribute mrScaler.compute.instanceGroups.masterGroup, change target to 3 and lifeCycle to ON_DEMAND.
-
(Optional) Under mrScaler.cluster, it is recommended to set terminationProtection to false. If this is not set, it will be impossible to delete the mrScaler because Spot will not be able to terminate the cluster in AWS.
-
Click Create.
You can also use elastigroupAwsEmrCreate in OpenAPI to create the cluster and configure multiple primary nodes as described above.
Core
- Instance Type: Choose one or more instance types from the dropdown list. Elastigroup will consider these types first when looking for an instance to bring up.
- Capacity Unit: Choose Instance or vCPU.
- Target: The desired number of instances or vCPU to run most of the time.
- Minimum: The number of instances or vCPU will never scale below this number.
- Maximum: The number of instances or vCPU will never scale above this number.
- Life Cycle: Choose Spot or On Demand.
Task
- Instance Type: Choose one or more instance types from the dropdown list. Elastigroup will consider these types first when looking for an instance to bring up.
- Capacity Unit: Choose Instance or vCPU.
- Target: The desired number of instances or vCPU to run most of the time.
- Minimum: The number of instances or vCPU will never scale below this number.
- Maximum: The number of instances or vCPU will never scale above this number.
- Life Cycle: Choose Spot or On Demand.
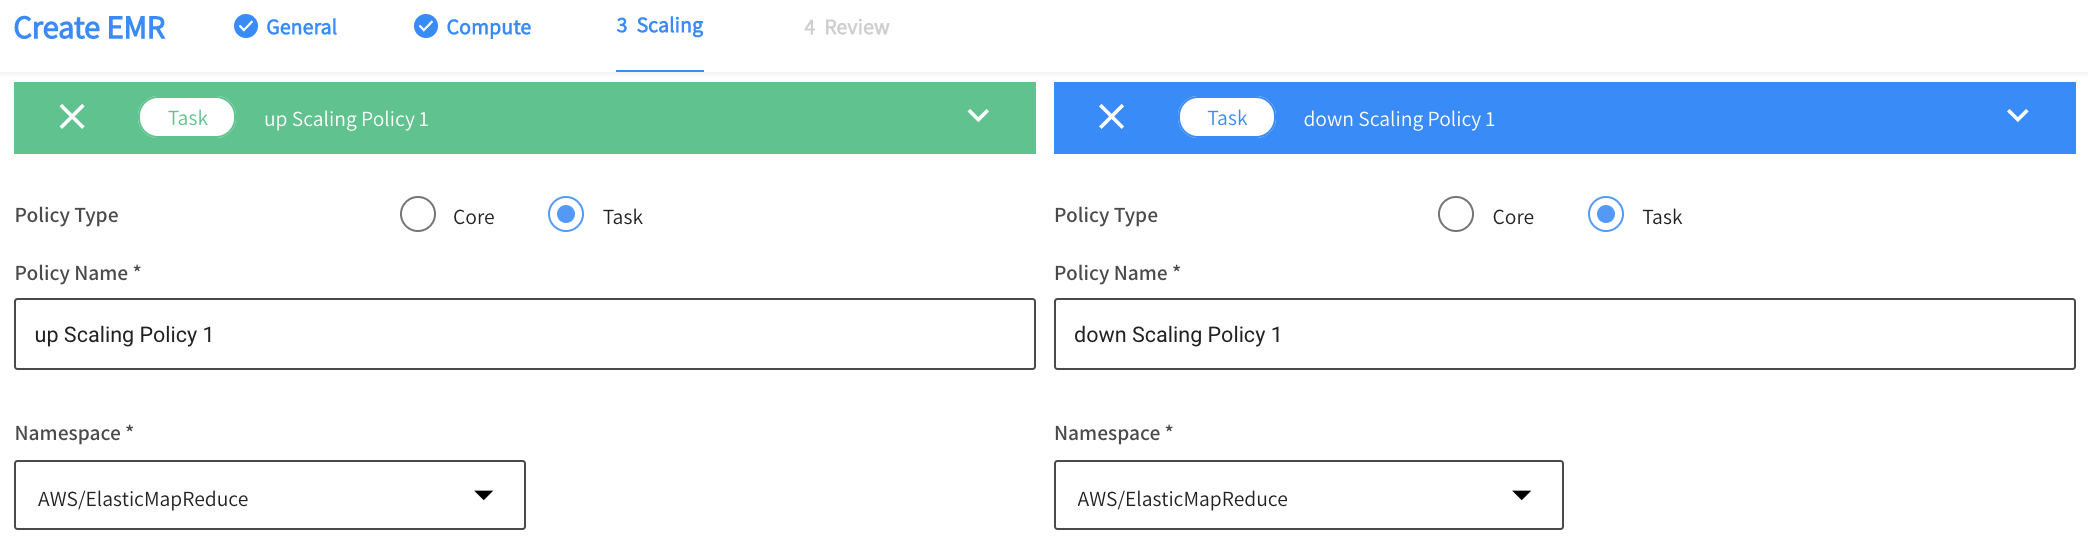
Step 3: Scaling
In the Scaling tab, you can add Up Scaling and Down Scaling policies. For each policy, complete the General and Based-on information described below. You can create multiple policies.
General Policy Information
- Policy Type: Choose Core or Task instance group.
- Policy Name: Enter a name for the policy.
- Namespace: Choose from the list. The default is AWS/ElasticMapReduce.
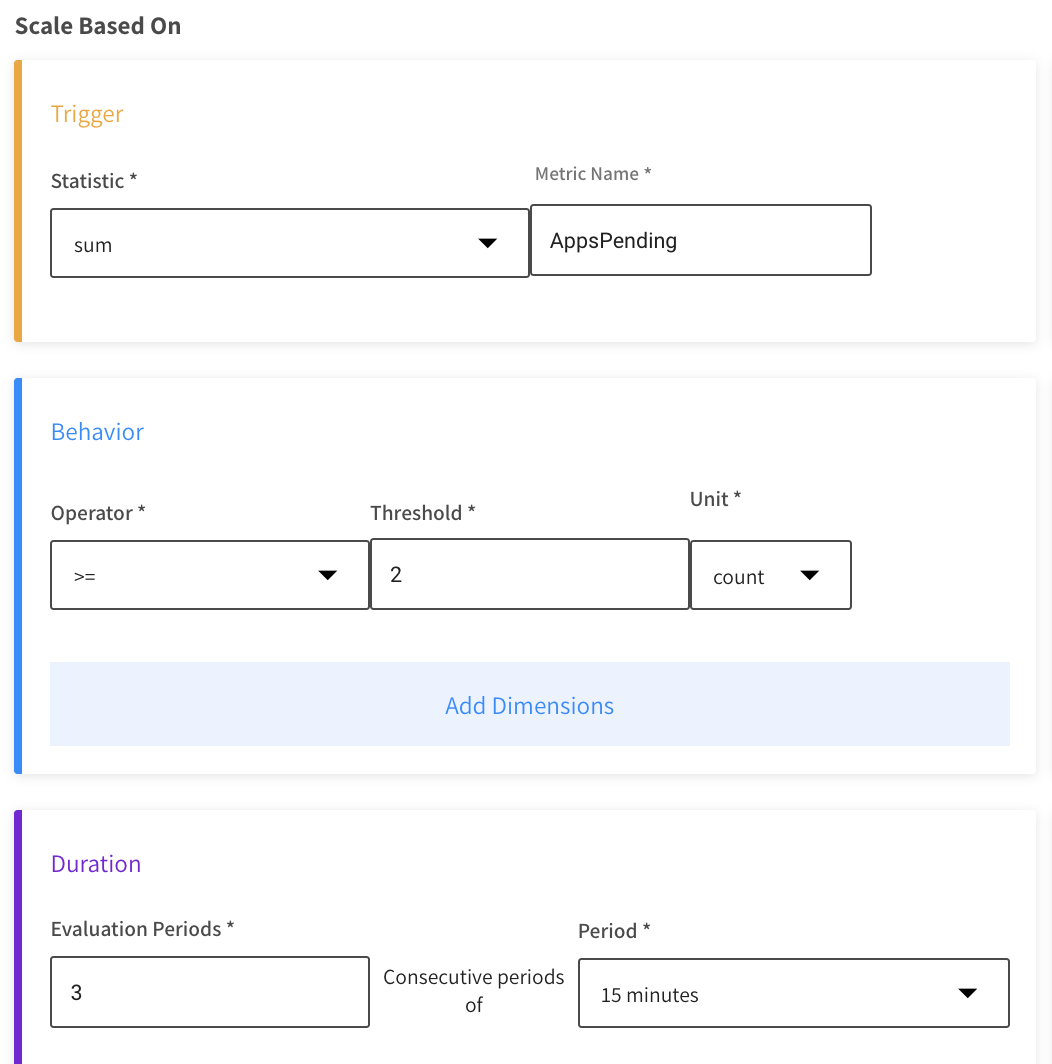
Scale Based on
- Trigger
- Statistic: Choose from the list the type of value that will be evaluated.
- Metric Name: Enter the specific metric to be evaluated.
- Behavior
- Operator: Choose the criterion for evaluating the metric, e.g., greater than, less than.
- Threshold: Enter the numerical limit for the metric.
- Unit: Choose the unit of measurement.
- Add Dimensions: (Optional) Choose from a list and set a value.
- Duration
- Evaluation Periods: The number of consecutive periods to be evaluated before triggering a scale action.
- Period: Choose the amount of time in a single period.
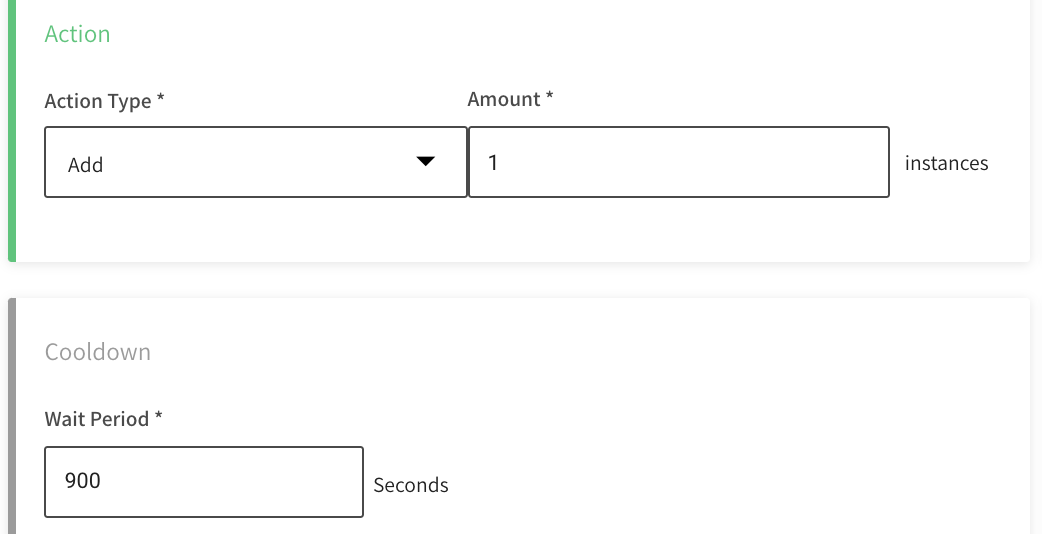
- Action
- Action Type: Choose the type of action to be taken.
- Amount: Set the number of instances that fits the expression. This depends on the Action Type you choose.
- Cooldown
- Wait Period: After a scaling action, there will be no new scaling action until this amount of time (seconds) has passed.
Scheduled Actions
You can schedule actions in order to scale cluster capacity during specific time frames. The time frames can be once or periodic and are defined as Cron expressions.
Scheduled actions apply only to Task instance groups. Whenever your scheduled action takes place, the entire action is performed at once, and not divided into batches. For example, if you have 50 instances running, and schedule a task to change the capacity to zero at 10 UTC on Sunday, then all 50 instances will be dropped at that time.
You can configure one or multiple Scheduled Actions:
-
Click Add Scheduled Action.
-
Choose the Action Type and enter any information required for the specific Action Type. For example, if the Action Type is Set Capacity Range, you enter the Target, Minimum, and Maximum.
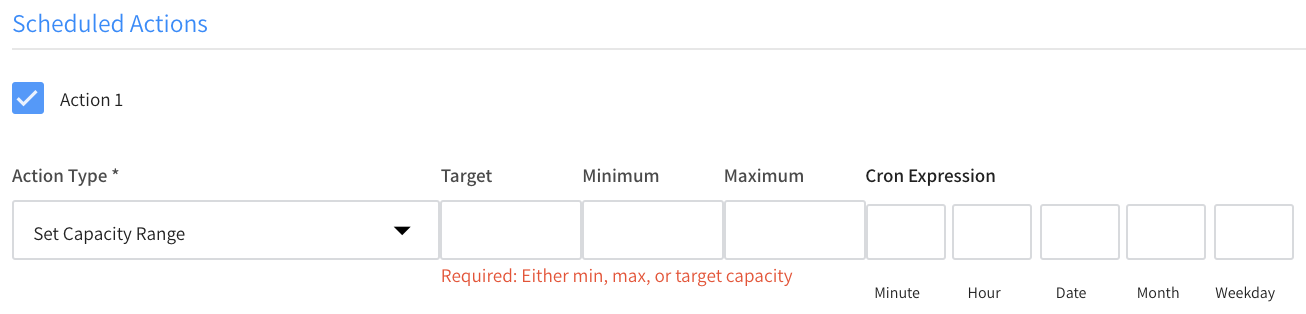
-
Enter the Cron expression.
-
Click Next and either Create or Update to save the scheduled action(s).
Step 4: Review & Create
-
Review your settings in the Review tab.
-
If you need to make any changes, such as adding multiple primary nodes, switch to Edit mode and edit the JSON configuration.
-
Click Create and launch your new EMR cluster.
Learn More About
Apache Airflow is a platform created to programmatically author, schedule, and monitor workflows, and it is now integrated with EMR. Learn more about:
- Using Spot operators for the Airflow integration with EMR, and
- How you plug them into an Apache Spark Submit Python file.