Create an Elastigroup for AWS
If you have already connected your AWS account, you can start creating Elastigroups.
Create an Elastigroup from Scratch
You can create an Elastigroup using an empty template. To create an Elastigroup based on an existing workload such as AWS Elastic Beanstalk or AutoScaling Groups, choose your workload type under Use Cases and import a copy of your workload configuration.
Prerequisite
Connect your AWS account to Spot.
Create an Elastigroup from Scratch
-
In the Spot console, go to Elastigroup > Groups.
-
Click Create.
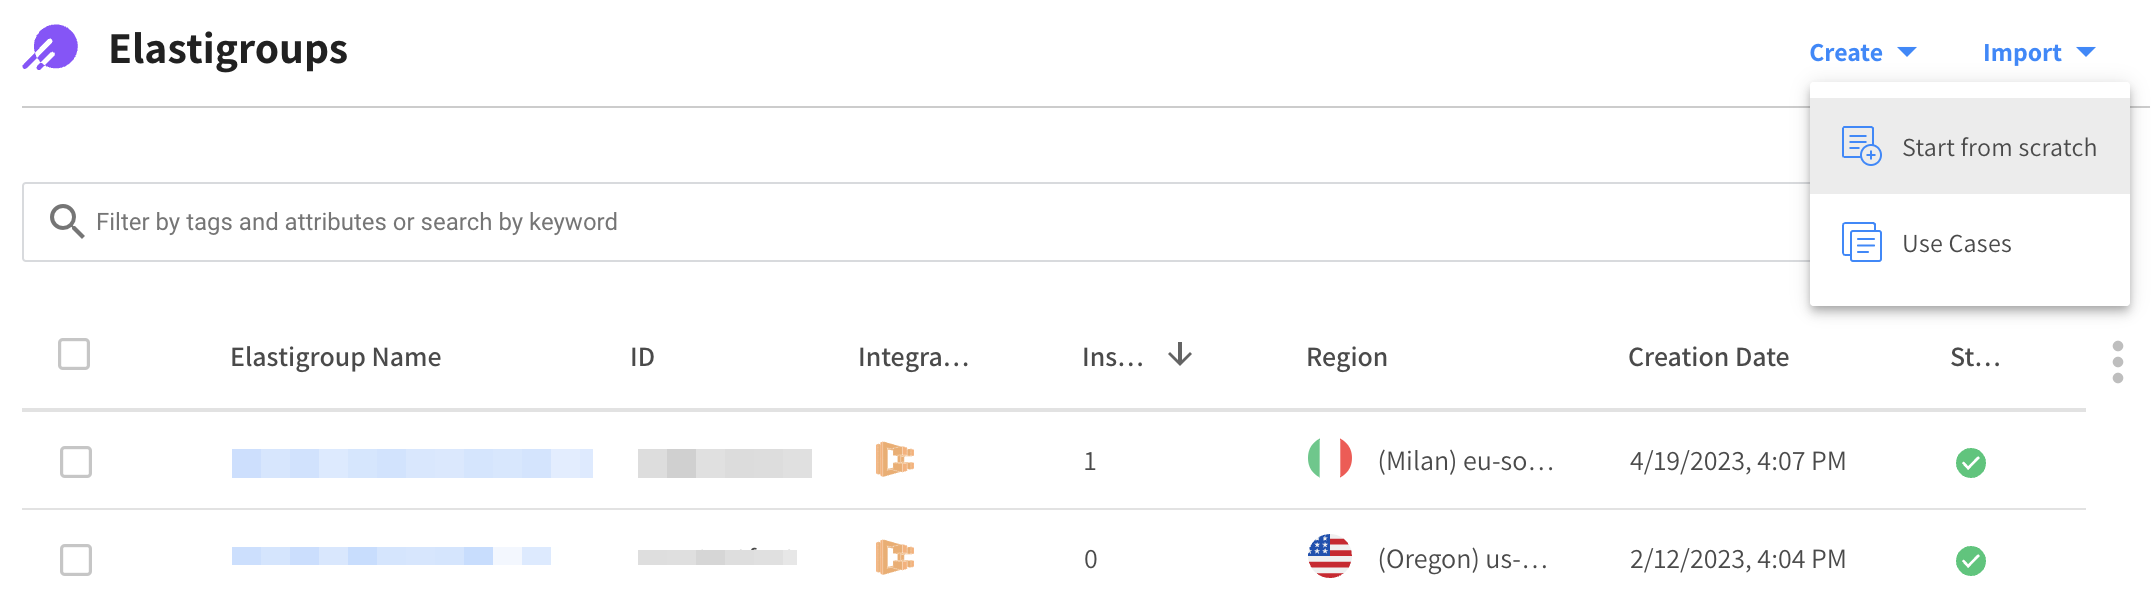
-
Click Start from scratch.
Create an Elastigroup using Use Cases
-
In the Spot console, go to Elastigroup > Groups.
-
Click Create and Use Cases.
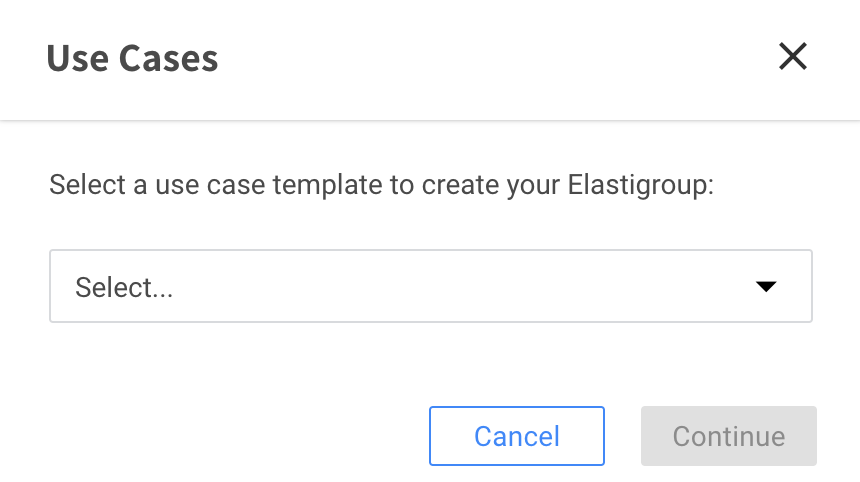
-
Select a use case.
Step 1: Basics
Basic Settings
- Name: The name of your Elastigroup.
- Description: A brief description describing the purpose of the group.
- Region: The AWS region where your group will be located.
- Key Pair: The key pair that will be used for authenticating your instances.
- Image: The AMI ID you want to use in your Elastigroup. This is the AMI you created in your AWS account. AMIs must be based in the same region as the Elastigroup.
Multiple AMI Support
Spot’s Elastigroup can support the use of multiple AMIs in a single Elastigroup. You can utilize both AWS Graviton and x86 instances in the same groups and the feature also allows the Elastigroup autoscaler to launch instances based on the best Spot pricing and availability in real time.
You can select up to three images. Keep in mind, the images need to:
- Be different from one another (different AMIs).
- Be from the same operating system (such as Windows, Linux/Unix).
- Have different architectures (such as ARM, x86-64).
Workload Capacity
Define your workload capacity:
- Capacity Unit: The units of the number of servers required, either in Instances (default) or vCPU.
- Target: The desired number of instances or vCPUs under normal operation.
- Minimum: The lowest number of instances or vCPUs that can be available.
- Maximum: The highest number of instances or vCPUs that can be available.
- Choose one of the following:
- Set by % of Spot instances: Percent of total instances that should be Spot instances. The rest will be On-Demand instances.
- Set by specific On-Demand count: A specific number of instances that must be On-Demand. The rest will be Spot instances.

Step 2: Networking
The networking section includes specific definitions of your network settings, load-balancer configuration, and auto-healing checks.
Launch Specification
Define the parameters of your virtual private cloud and security groups for your Elastigroup:
- Select the VPC you want your Elastigroup to run in.
- Select the security groups for your instances.
Load Balancing (Optional)
Select how you want to manage your incoming traffic:
- No load balancer: You can manage your Elastigroup without load balancers.
- Attach existing load balancers: Attach your Elastigroup instances to an existing ELB or Target Group from your AWS account.
Auto Healing (Optional)
You can set up auto-healing health checks:
- Select the Auto Healing type. This checks the instance’s health according to the resource you specify and automatically replaces instances as they become healthy.
- Select the Health Check Grace Period in seconds. This is the timeout period (in seconds) that newly launched instances become healthy. If an instance fails the health check after the given grace period, it will be terminated and replaced with a new one.
- Unhealthy Duration in seconds. This is the amount of time (in seconds) you want to keep unhealthy instances before the instance is terminated and replaced with a new one.
Step 3: Compute
The compute section includes all the relevant information needed in order to form the instance candidates list for your Elastigroup.
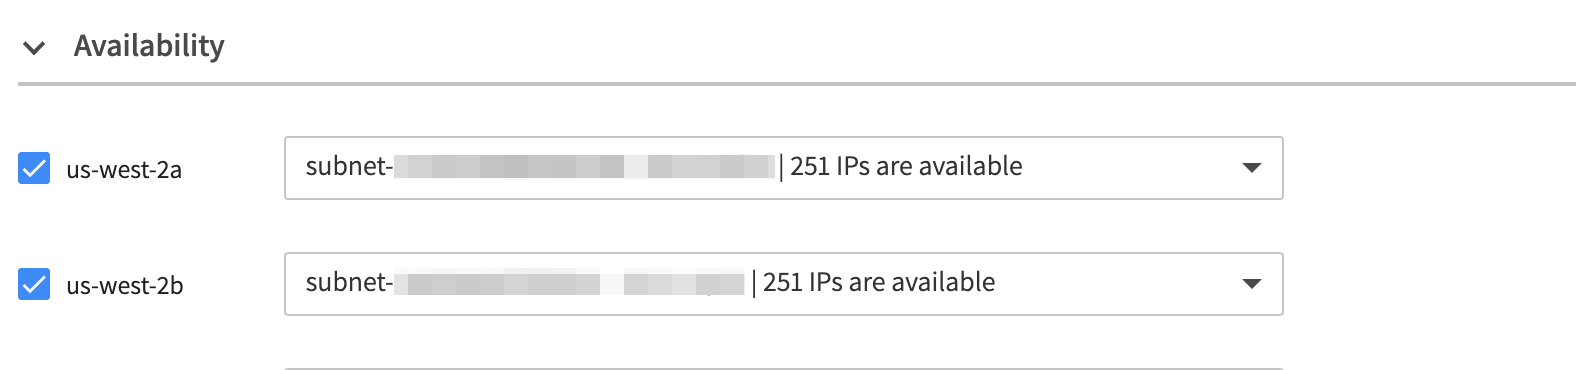
Availability
- Choose one or more availability zones (AZs) Elastigroup should consider when launching your instances. To maximize your savings, Elastigroup calculates the cost of launching Spot instances in the selected availability zones. Select multiple availability zones to increase the number of Spot instance markets available for Elastigroup to consider.
- Select a subnet for the availability zone.
Cluster Orientation
You can use these prediction algorithms:
- Balanced (recommended)
- Availability
- Cost
Instance Selection
You can select instances based on attributes or manually.
Attribute-based Selection
Specify instance attributes that match your compute requirements.
- Select the vCPU and memory.
- Select the type of filter:
- Instance types to exclude
- Instance families to exclude
- Generations to exclude
- Spot Types: Choose the instance types Elastigroup should consider when launching your instances. Spot recommends selecting multiple instance types to provide Elastigroup with as many Spot instance market options as possible.
- On-demand Type: Choose the on-demand type to use in the event that no Spot instances are available in your desired markets.
- Preferred Spot Types: Select at least one preferred Spot type to prioritize. This constitutes a higher percentage of the group's instance type mix.
Manual Selection
Select instance types that match your compute requirements:
- At least one Spot type.
- An On-demand Spot type.
Market Statistics
You can view the market statistics of your selection.
- Selected Markets: This shows the amount of selected markets.
- Average Score: The average score for all selected markets. Market score is a reflection of the market's stability, based on Elastigroup's prediction algorithm.
- Average Savings: The average savings you can achieve by utilizing the selected spot markets.
Click More Details under Market Statistics in the manual selection to open the heat-map. This shows the availability score per market.
Optimization (Optional)
Define your optimization strategy.
Fallback to On-Demand
If no Spot instances are available, an on-demand instance will be provisioned to meet the capacity requirement.
Utilize Commitment Plans
Elastigroup provisions On-demand instances if there are any vacant savings plans or reserved instances that match any instance type defined in the Compute section. The utilization order is: RIs, EC2 SP, Compute SP.
Choose one of the following:
- Reserved Instances
- Reserved Instances and Savings Plans
When you choose Utilize Commitment Plans, make sure your RoleARN is updated with the latest policy.
Continuous Optimization
If fallback to on-demand instances has occurred, you can choose when your workload should be returned to spot instances or moved to an instance type that has already purchased an available reserved capacity. Switch this On (default) to return the instances automatically.
Choose one of the following:
- Once Available: Your workload will return to spot instances automatically whenever they become available.
- Custom: Define time windows that your workloads can be returned to spot instances. When you choose this option, you will be prompted to fill in the time ranges.
Draining Timeout
Define the draining period your application requires for the automation to start replacing the instances. Define enough time before the interruption is predicted to occur, to allow complete draining.
Advanced Settings
- IAM Role: An IAM role must be defined in your AWS account before you can use it.
- Public IP: Requests an ephemeral public IP address from Amazon's public IP address pool so you can reach your instance from the internet.
- Tenancy: Dedicated tenancy ensures that all the instances that are launched by the Elastigroup will run on a dedicated host. Note: Dedicated tenancy charges a flat hourly fee for each region.
- Elastic IPs: Specify one or many Elastic IPs to associate with the instances in the Elastigroup. Whenever an instance is replaced, the Elastic IP will automatically be associated with a different EC2 instance in your group.
- EBS Optimized: Check this box to enable EBS optimized capacity for high bandwidth connectivity to the EBS service for non EBS optimized instance types. For instances that are EBS optimized, this checkbox will be ignored.
- Add Detailed Monitoring: Check this box to enable Cloud Watch detailed monitoring (of one-minute increments). Note: There are additional hourly costs for this service based on the region used.
- Associate IPv6 Address: Requests an IPv6 address from the VPC IPv6 CID address pool.
- User Data: You can specify user data to run a configuration script during the launch.
- Shutdown Script: You can specify and run a shutdown script to execute commands right before instance termination. This is useful if you rely on automated scripts to shut down instances, allowing them time to perform tasks such as exporting logs, or syncing with other systems.
Step 4: Scaling (Optional)
Optionally, you can select to not have a scaling policy or have a target scaling policy.
Step 5: Review and Create
When you finish filling in the information in the template, you can review the configuration and edit it in JSON, CloudFormation, or Terraform formats.
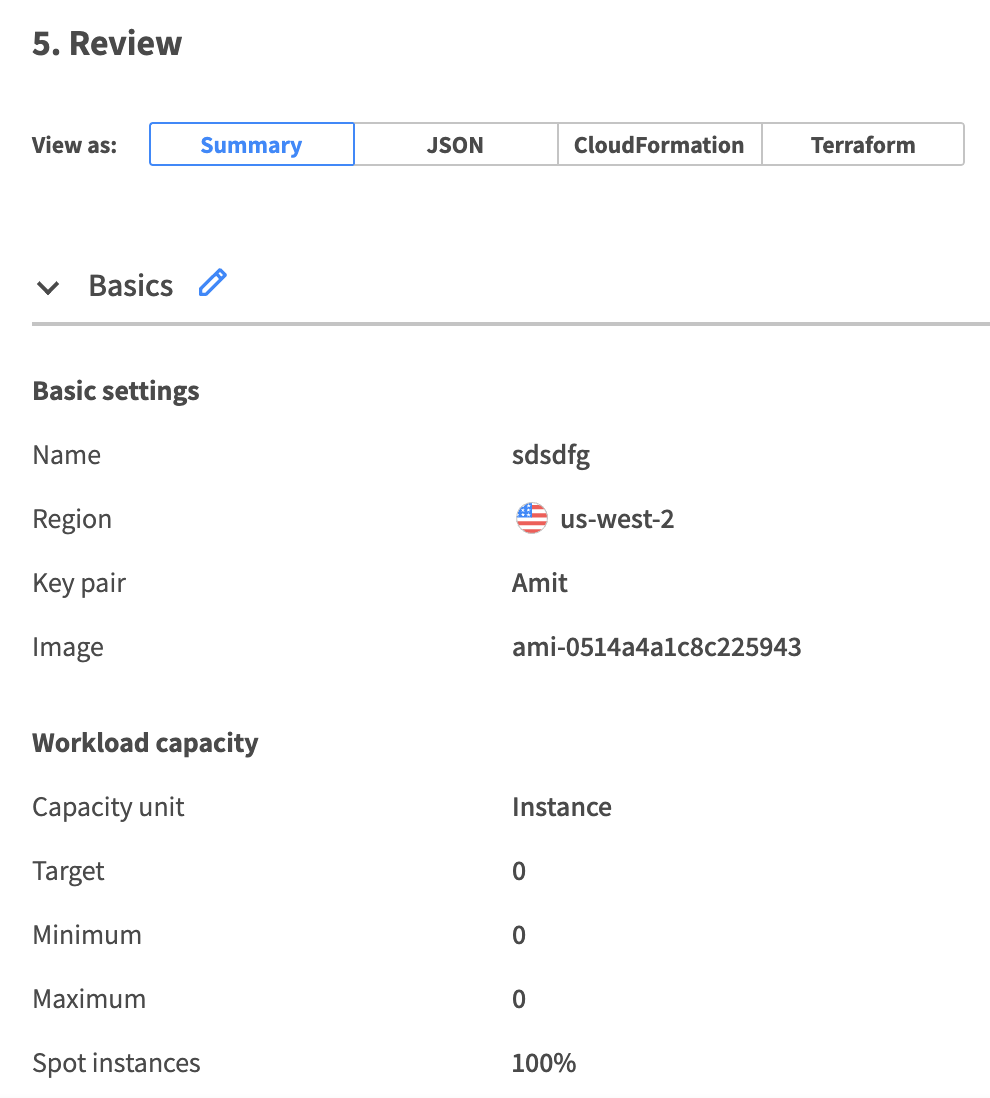
After reviewing and making any changes, select Next and launch your Elastigroup.
Create an Elastigroup from scratch in the legacy design
This procedure describes how to create an Elastigroup using an empty template. To create an Elastigroup based on an existing workload, such as AWS Elastic Beanstalk or AutoScaling Groups, choose your workload type under Use Cases and import a copy of your workload configuration.
Prerequisite
Connect your AWS account to Spot.
Get Started
-
In the Spot console, select Elastigroup > Groups > Create Elastigroup.
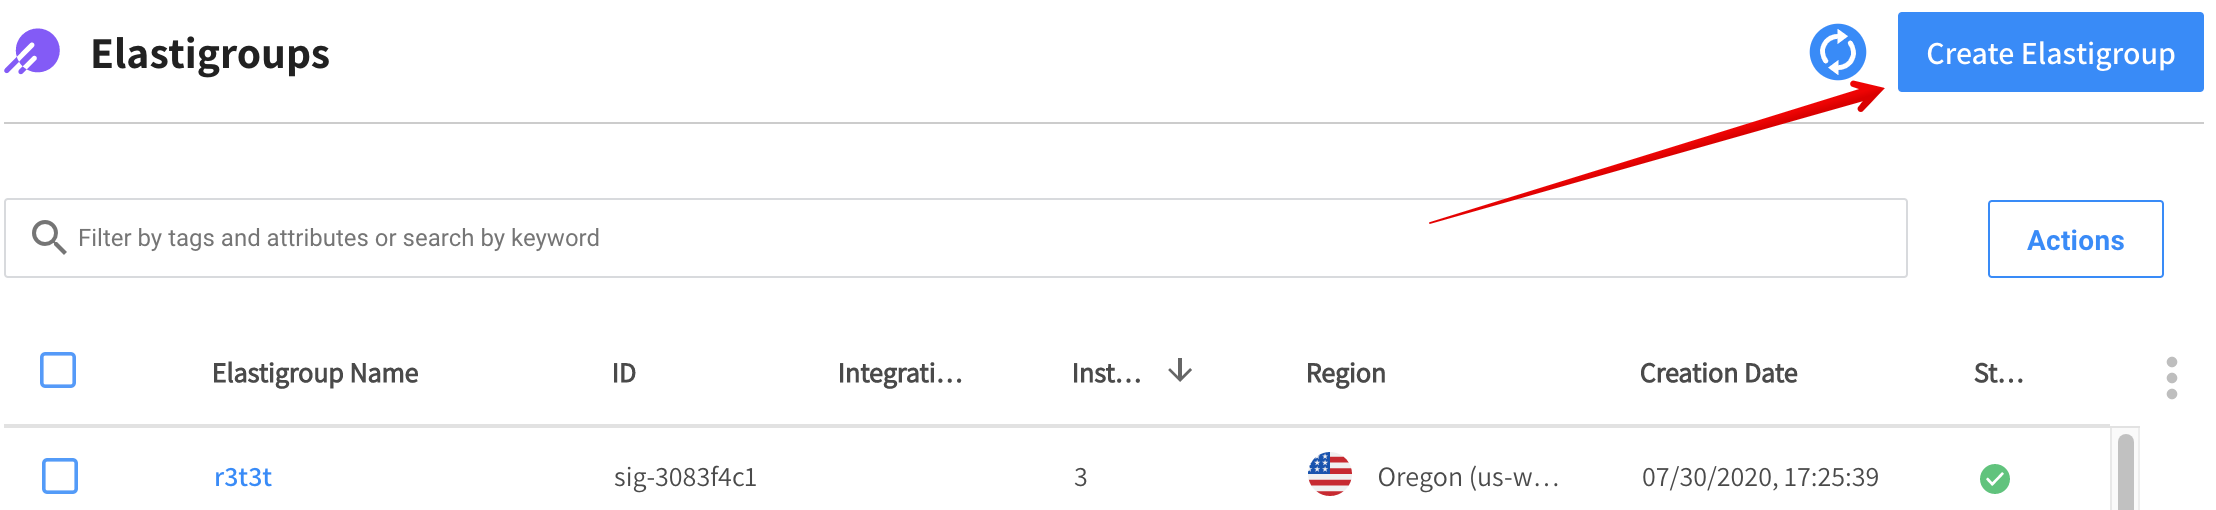
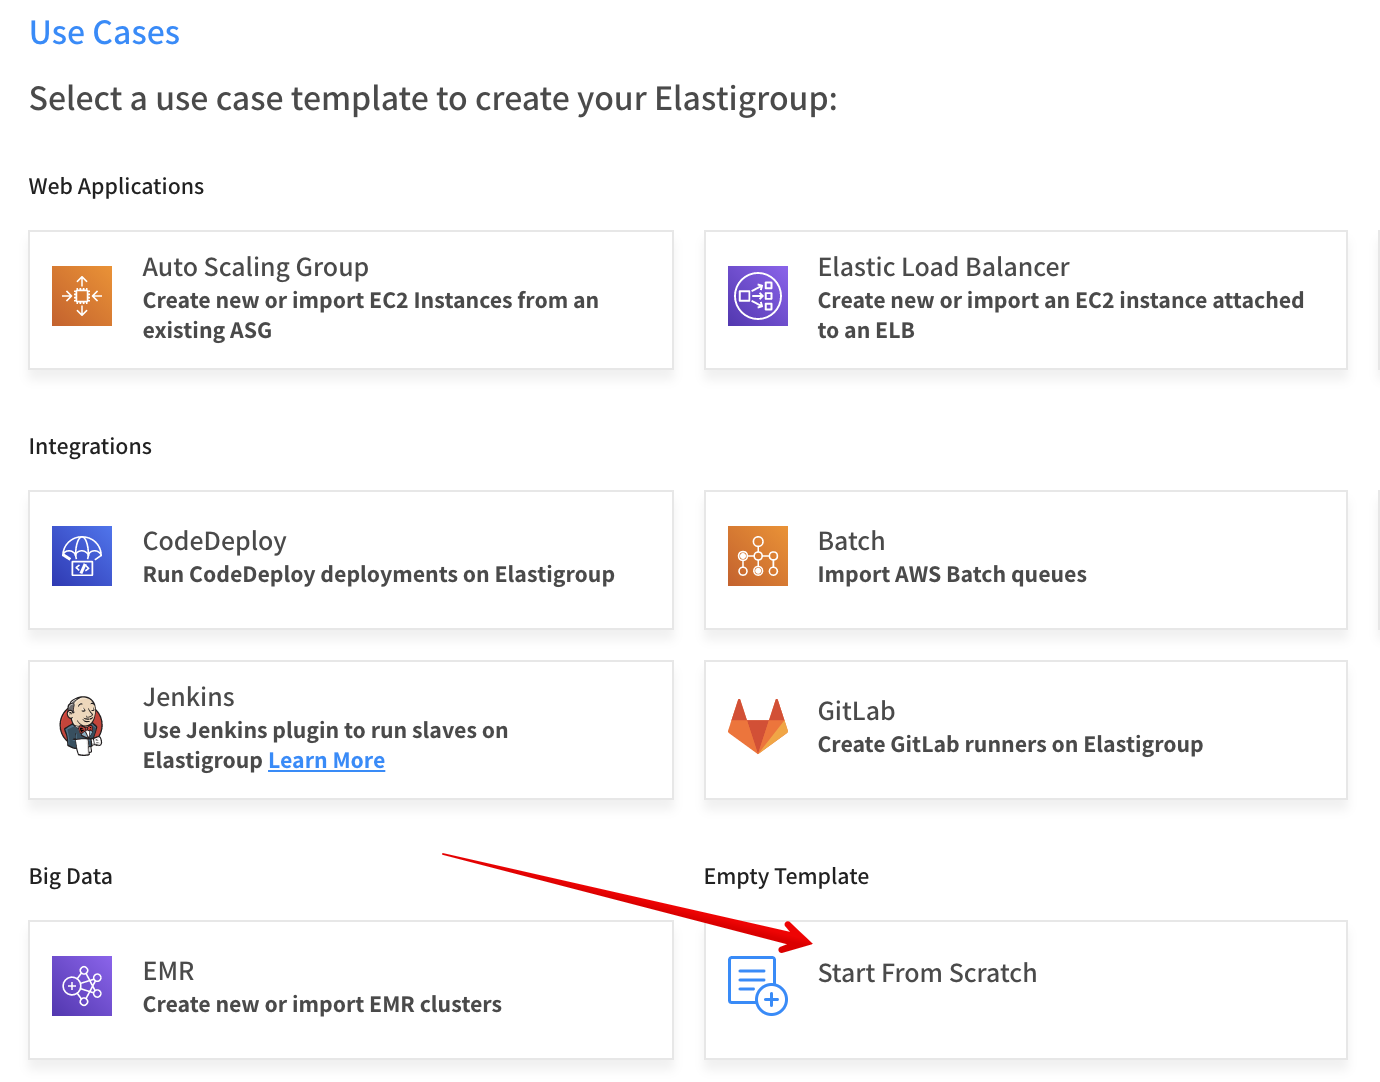
-
Select Empty Template > Start from Scratch.
Step 1: General
- On the General page, enter the following information:
- Name: The name of your Elastigroup
- Region: The AWS region where your group will be located.
- Description: A brief description describing the purpose of the group.
- Click Next.
Step 2: Compute
-
On the Compute page:
- VPC: Choose the VPC in which your Elastigroup will run.
- Product: Choose the OS type to use (e.g., Linux, Red Hat, etc.)
- On-demand Type: Choose the on-demand type to use in the event that no spot instances are available in your desired markets.
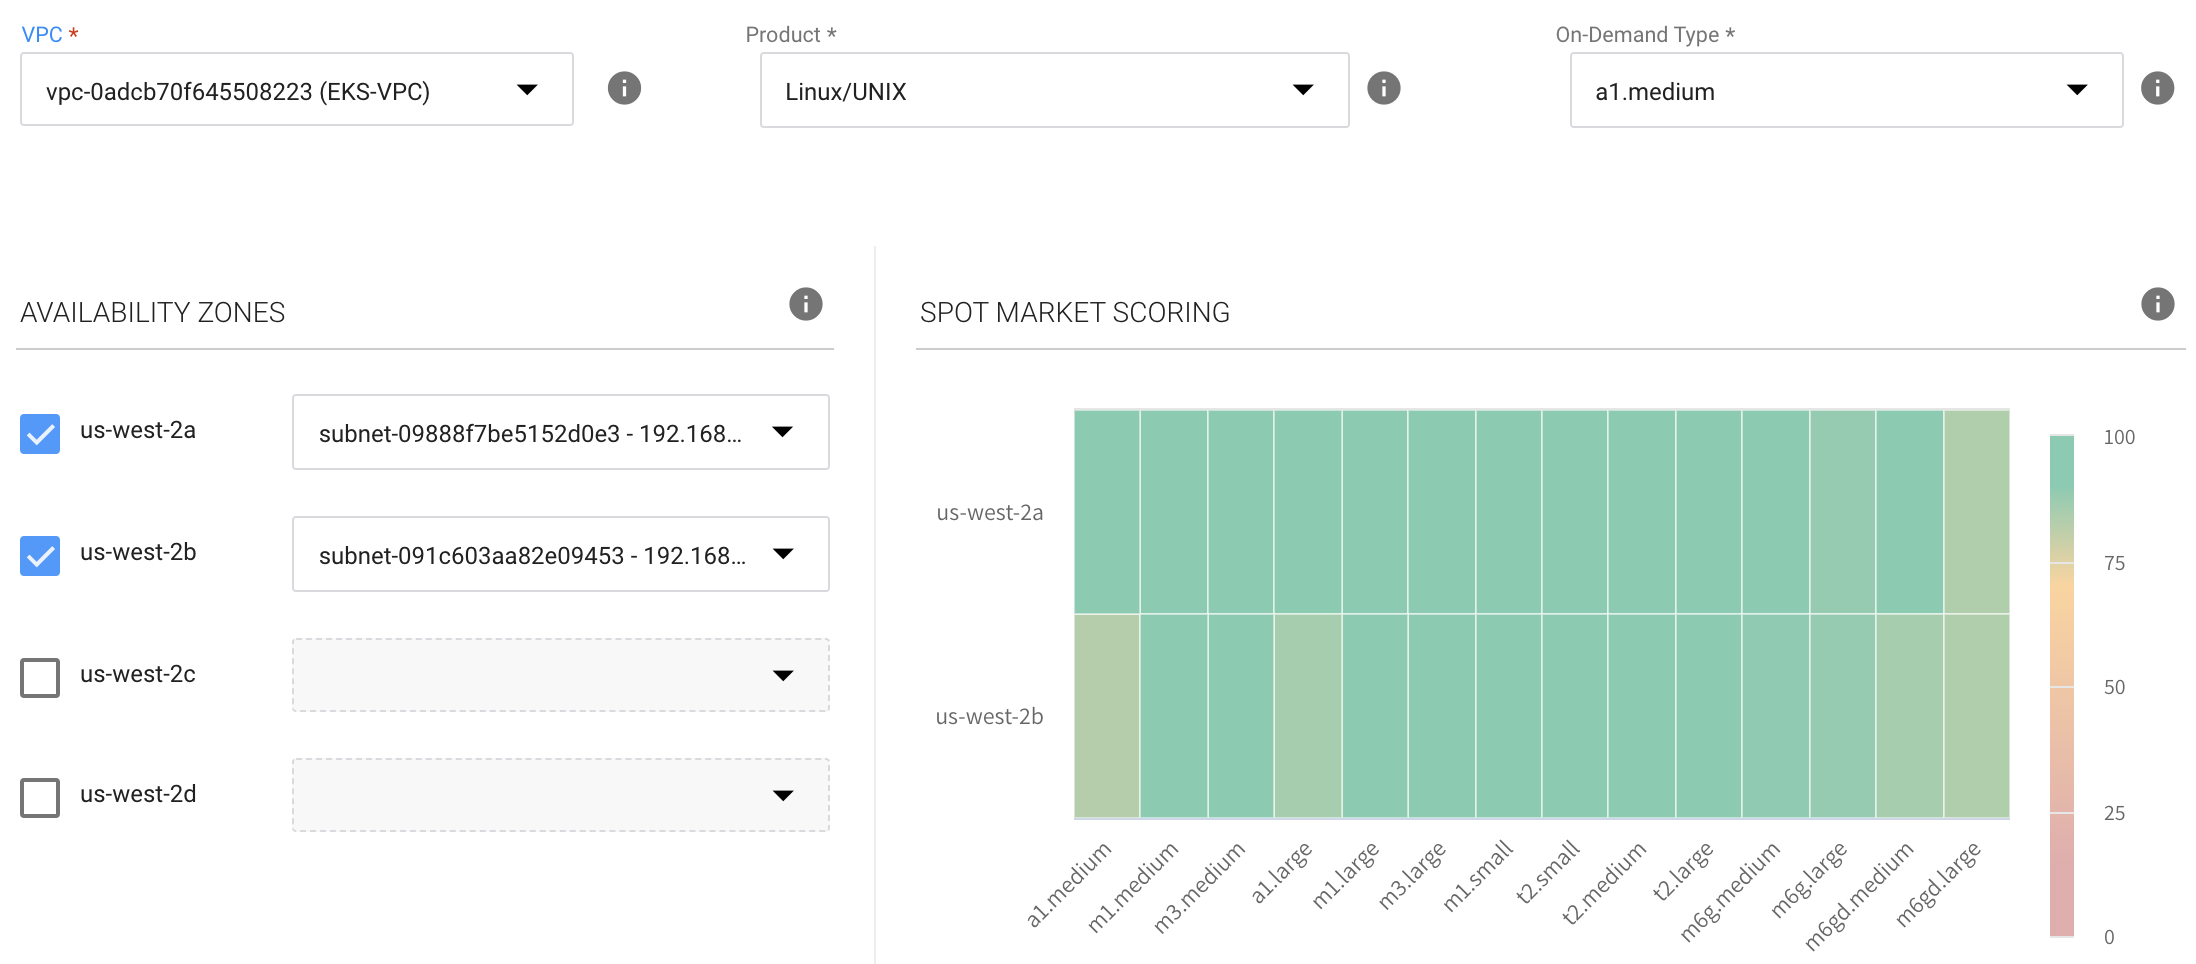
-
Choose one or more Availability Zones (AZs) Elastigroup should consider when launching your instances. To maximize your savings, Elastigroup calculates the cost of launching spot instances in the selected AZs. We recommend selecting multiple Availability Zones to increase the number of spot instance markets available for Elastigroup to consider.
-
Subnets: Choose one or more subnets for each AZ you define.
-
Spot Types: Choose the instance types Elastigroup should consider when launching your instances. We recommend selecting multiple instance types to provide Elastigroup with as many Spot instance market options as possible.
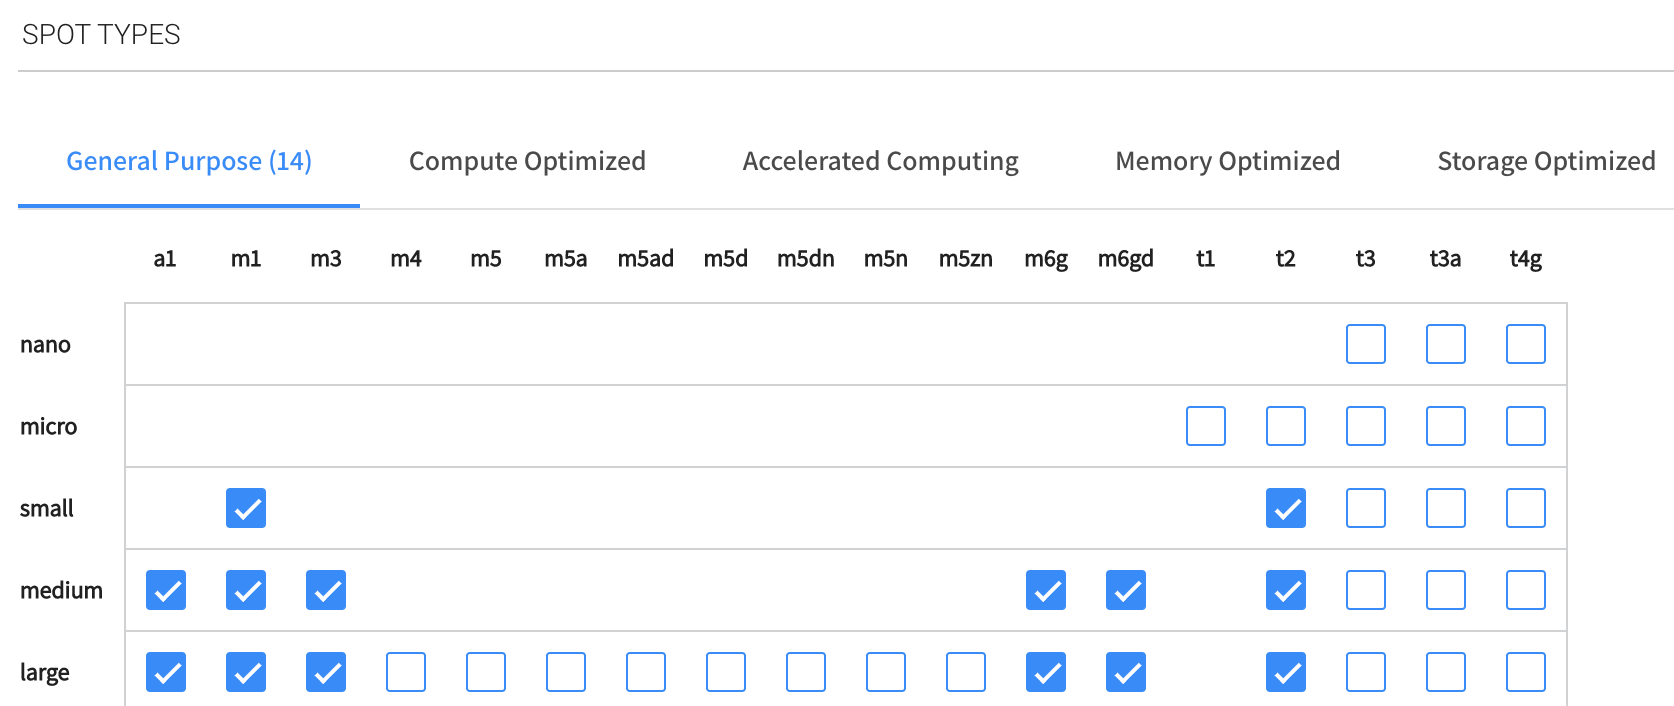 tip
tipSelect multiple availability zones and multiple instance types to give Elastigroup more spot markets. This will give you lower prices and greater availability.
-
Launch Specification:
- Image: Choose the AMI to use for your Elastigroup. The AMI should be based in the same region as your Elastigroup.
- Security Groups: Choose one or more security to apply to your instances.
- Key Pair: Enter the key pair that will be used for authenticating with your instances.
-
Click Next.
Step 3: Predictive Rebalancing
Workload Capacity
- Capacity Unit: The units of the number of servers required, either in Instances (default) or vCPU.
- Target: The desired number of instances or vCPUs under normal operation.
- Minimum: The lowest number of instances or vCPUs that can be available.
- Maximum: The highest number of instances or vCPUs that can be available.
- Choose one of the following:
- Set by % of spot instances: Percent of total instances that should be spot instances. The rest will be on-demand instances.
- Set by specific On-Demand count: A specific number of instances that must be On-Demand. The rest will be spot instances. If you chose vCPU as the capacity unit, Elastigroup will choose on-demand instance types that provide the total number of vCPUs requested. For example, if you requested four vCPUs, Elastigroup may choose two instance types with two vCPUs on each (or any other combination meeting the requirement), making a total of four vCPUs.
Optimization Strategy
Fallback to On-Demand
If no spot instances are available, an on-demand instance will be provisioned to meet the capacity requirement.
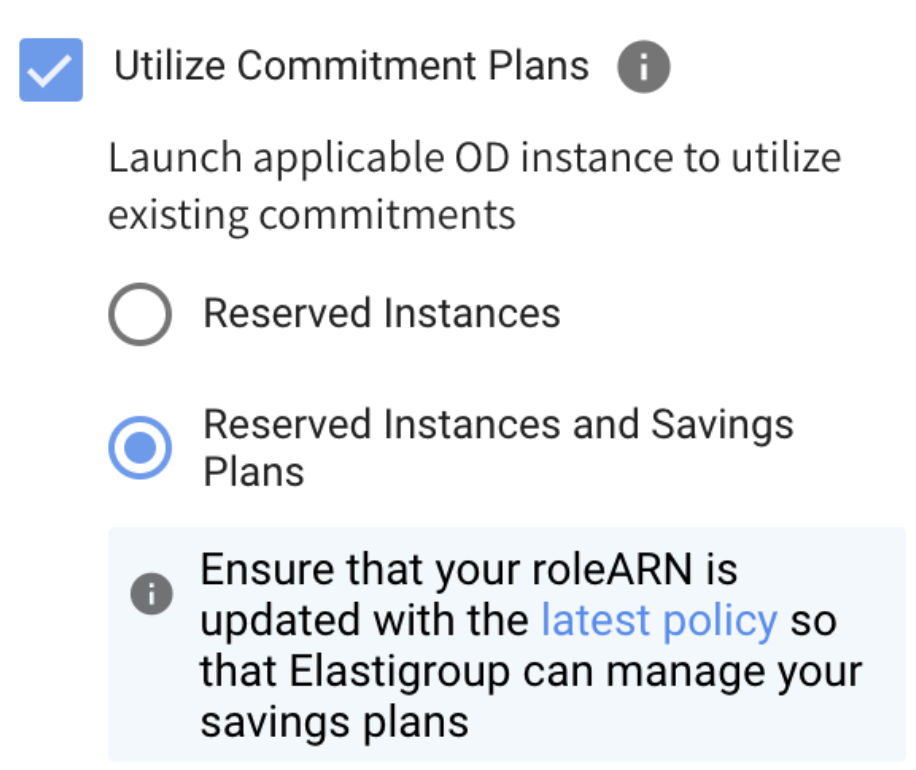
Utilize Commitment Plans
Elastigroup will automatically provision on-demand instances if there are any vacant Savings Plans or reserved instances that match any instance type defined in the Compute page. The utilization order is: RIs, EC2 SP, Compute SP. Choose one of the following:
- Reserved Instances
- Reserved Instances and Savings Plans
When you choose Utilize Commitment Plans, ensure that your RoleARN is updated with the latest policy.
Cluster Orientation
Specify which prediction algorithm to use:
- Balanced (recommended)
- Availability
- Cost
- Cheapest
Continuous Optimization
Continuous Optimization: If fallback to on-demand instances has occurred, you can choose when your workload should be returned to spot instances or moved to an instance type that has already-purchased an available reserved capacity. Switch this On (default) to return the instances automatically.
- Once Available: Your workload will return to spot instances automatically whenever they become available.
- Custom: You define one or more time windows that your workloads can be returned to spot instances. When you choose this option, you will be prompted to fill in the time ranges.
Instance Availability
This option enables you to define availability preferences and gain visibility into EC2 spot instance availability. After you define these preferences, Spot will do the following:
-
Display the resulting market scoring chart showing the probabilities of meeting your specifications.
-
Deploy instances that have the highest probability of matching your specifications.
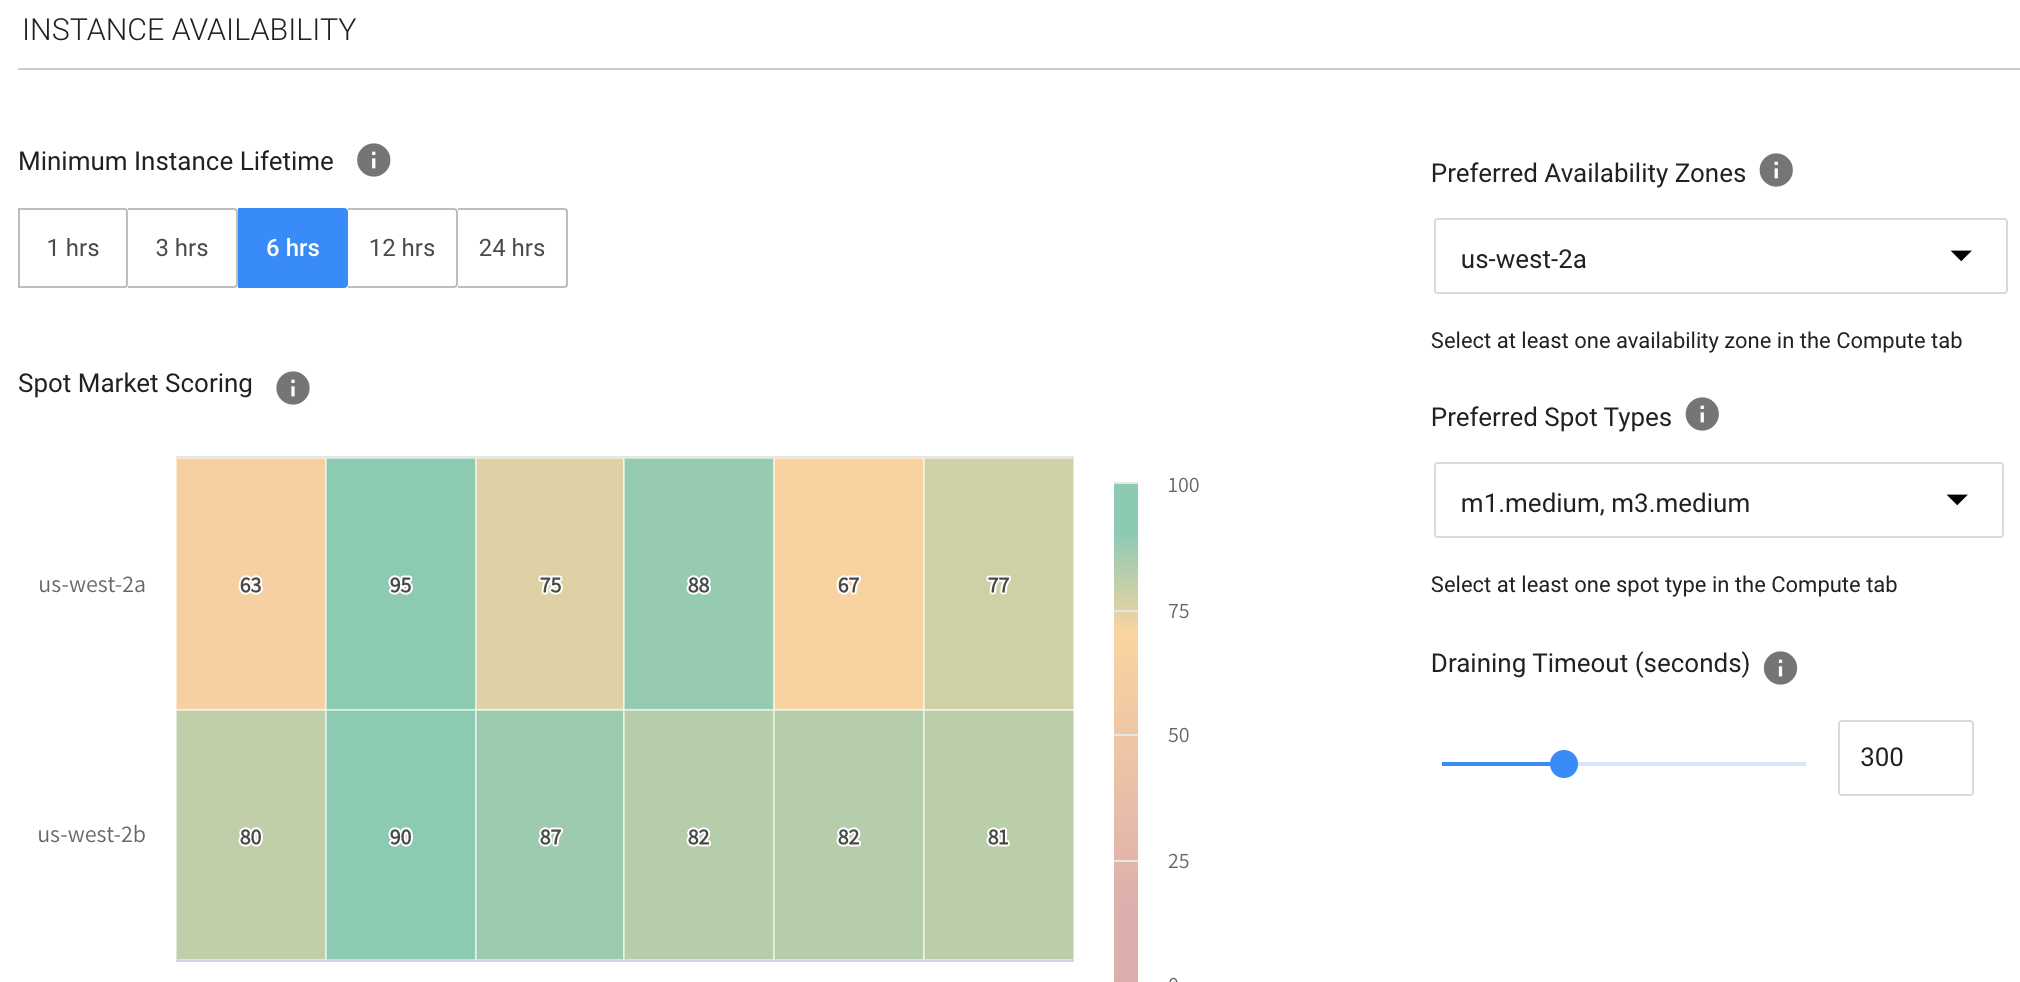
Specify the following:
- Preferred Availability Zones: Choose one or more of the availability zones that you defined in the Compute tab.
- Preferred Spot Types: Choose one or more of the instance types you defined in the Compute tab.
- Draining Timeout: In addition, you can define the draining period your application requires so the automation will start replacing the instances with enough time before the interruption is predicted to occur, allowing for complete and graceful draining.
When you have finished setting up Predictive Rebalancing, click Next.
Step 4: Scaling (Optional)
Optionally, you can create a Simple Scaling Policy and/or a Target Scaling Policy.
Step 5: Review and Create
When you have finished filling in the information in the template, you can review the configuration and edit it in JSON, CloudFormation or Terraform formats.
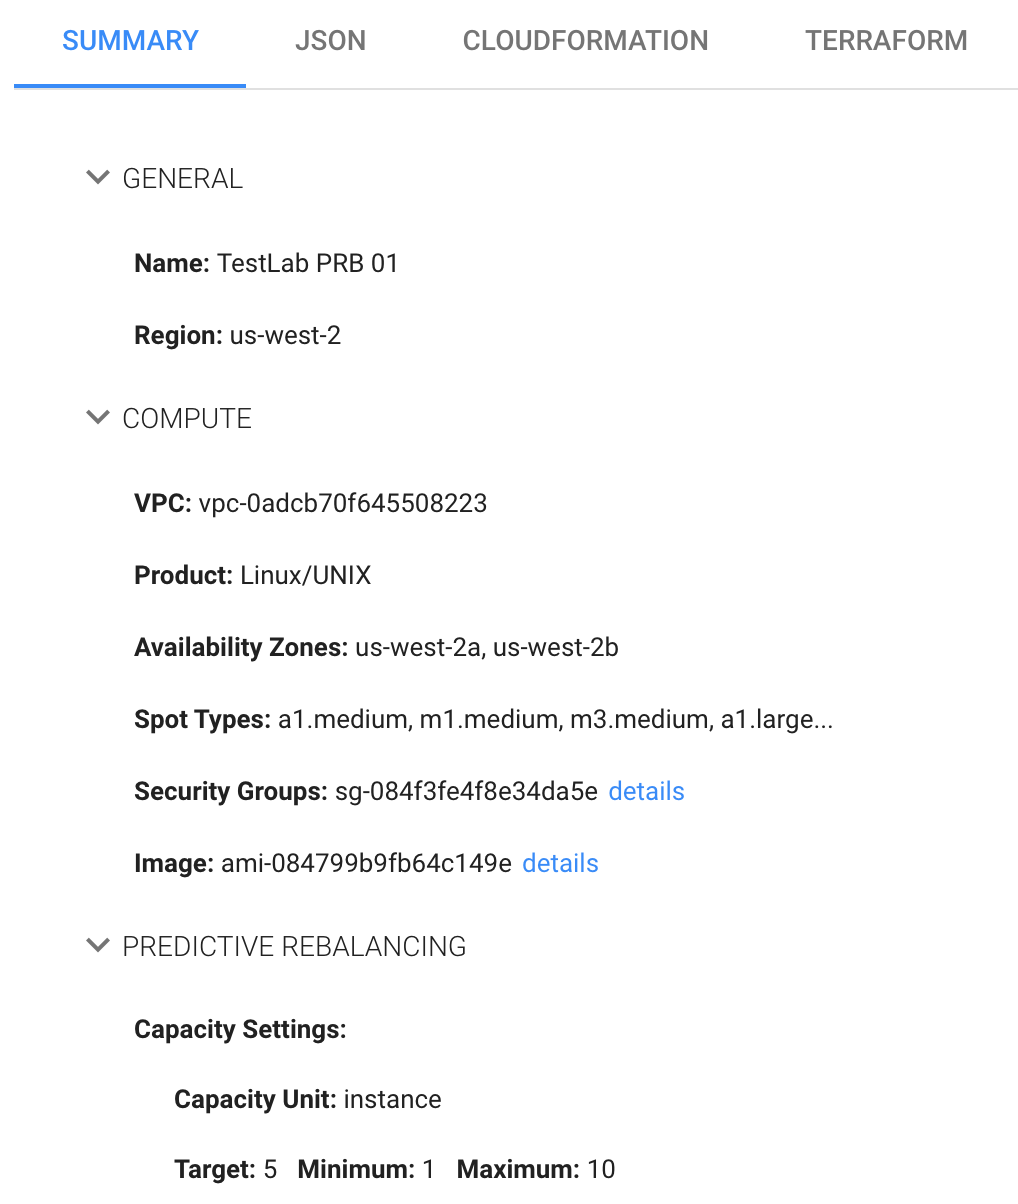
After reviewing and making any required changes, click Next and launch your Elastigroup.