Run your First Workflow
You can run a workflow by ensuring that it has the four following components:
- A unique name.
- A trigger.
- An action node.
- A description in the settings.
Prerequisites
- Create a workflow.
- API keys.
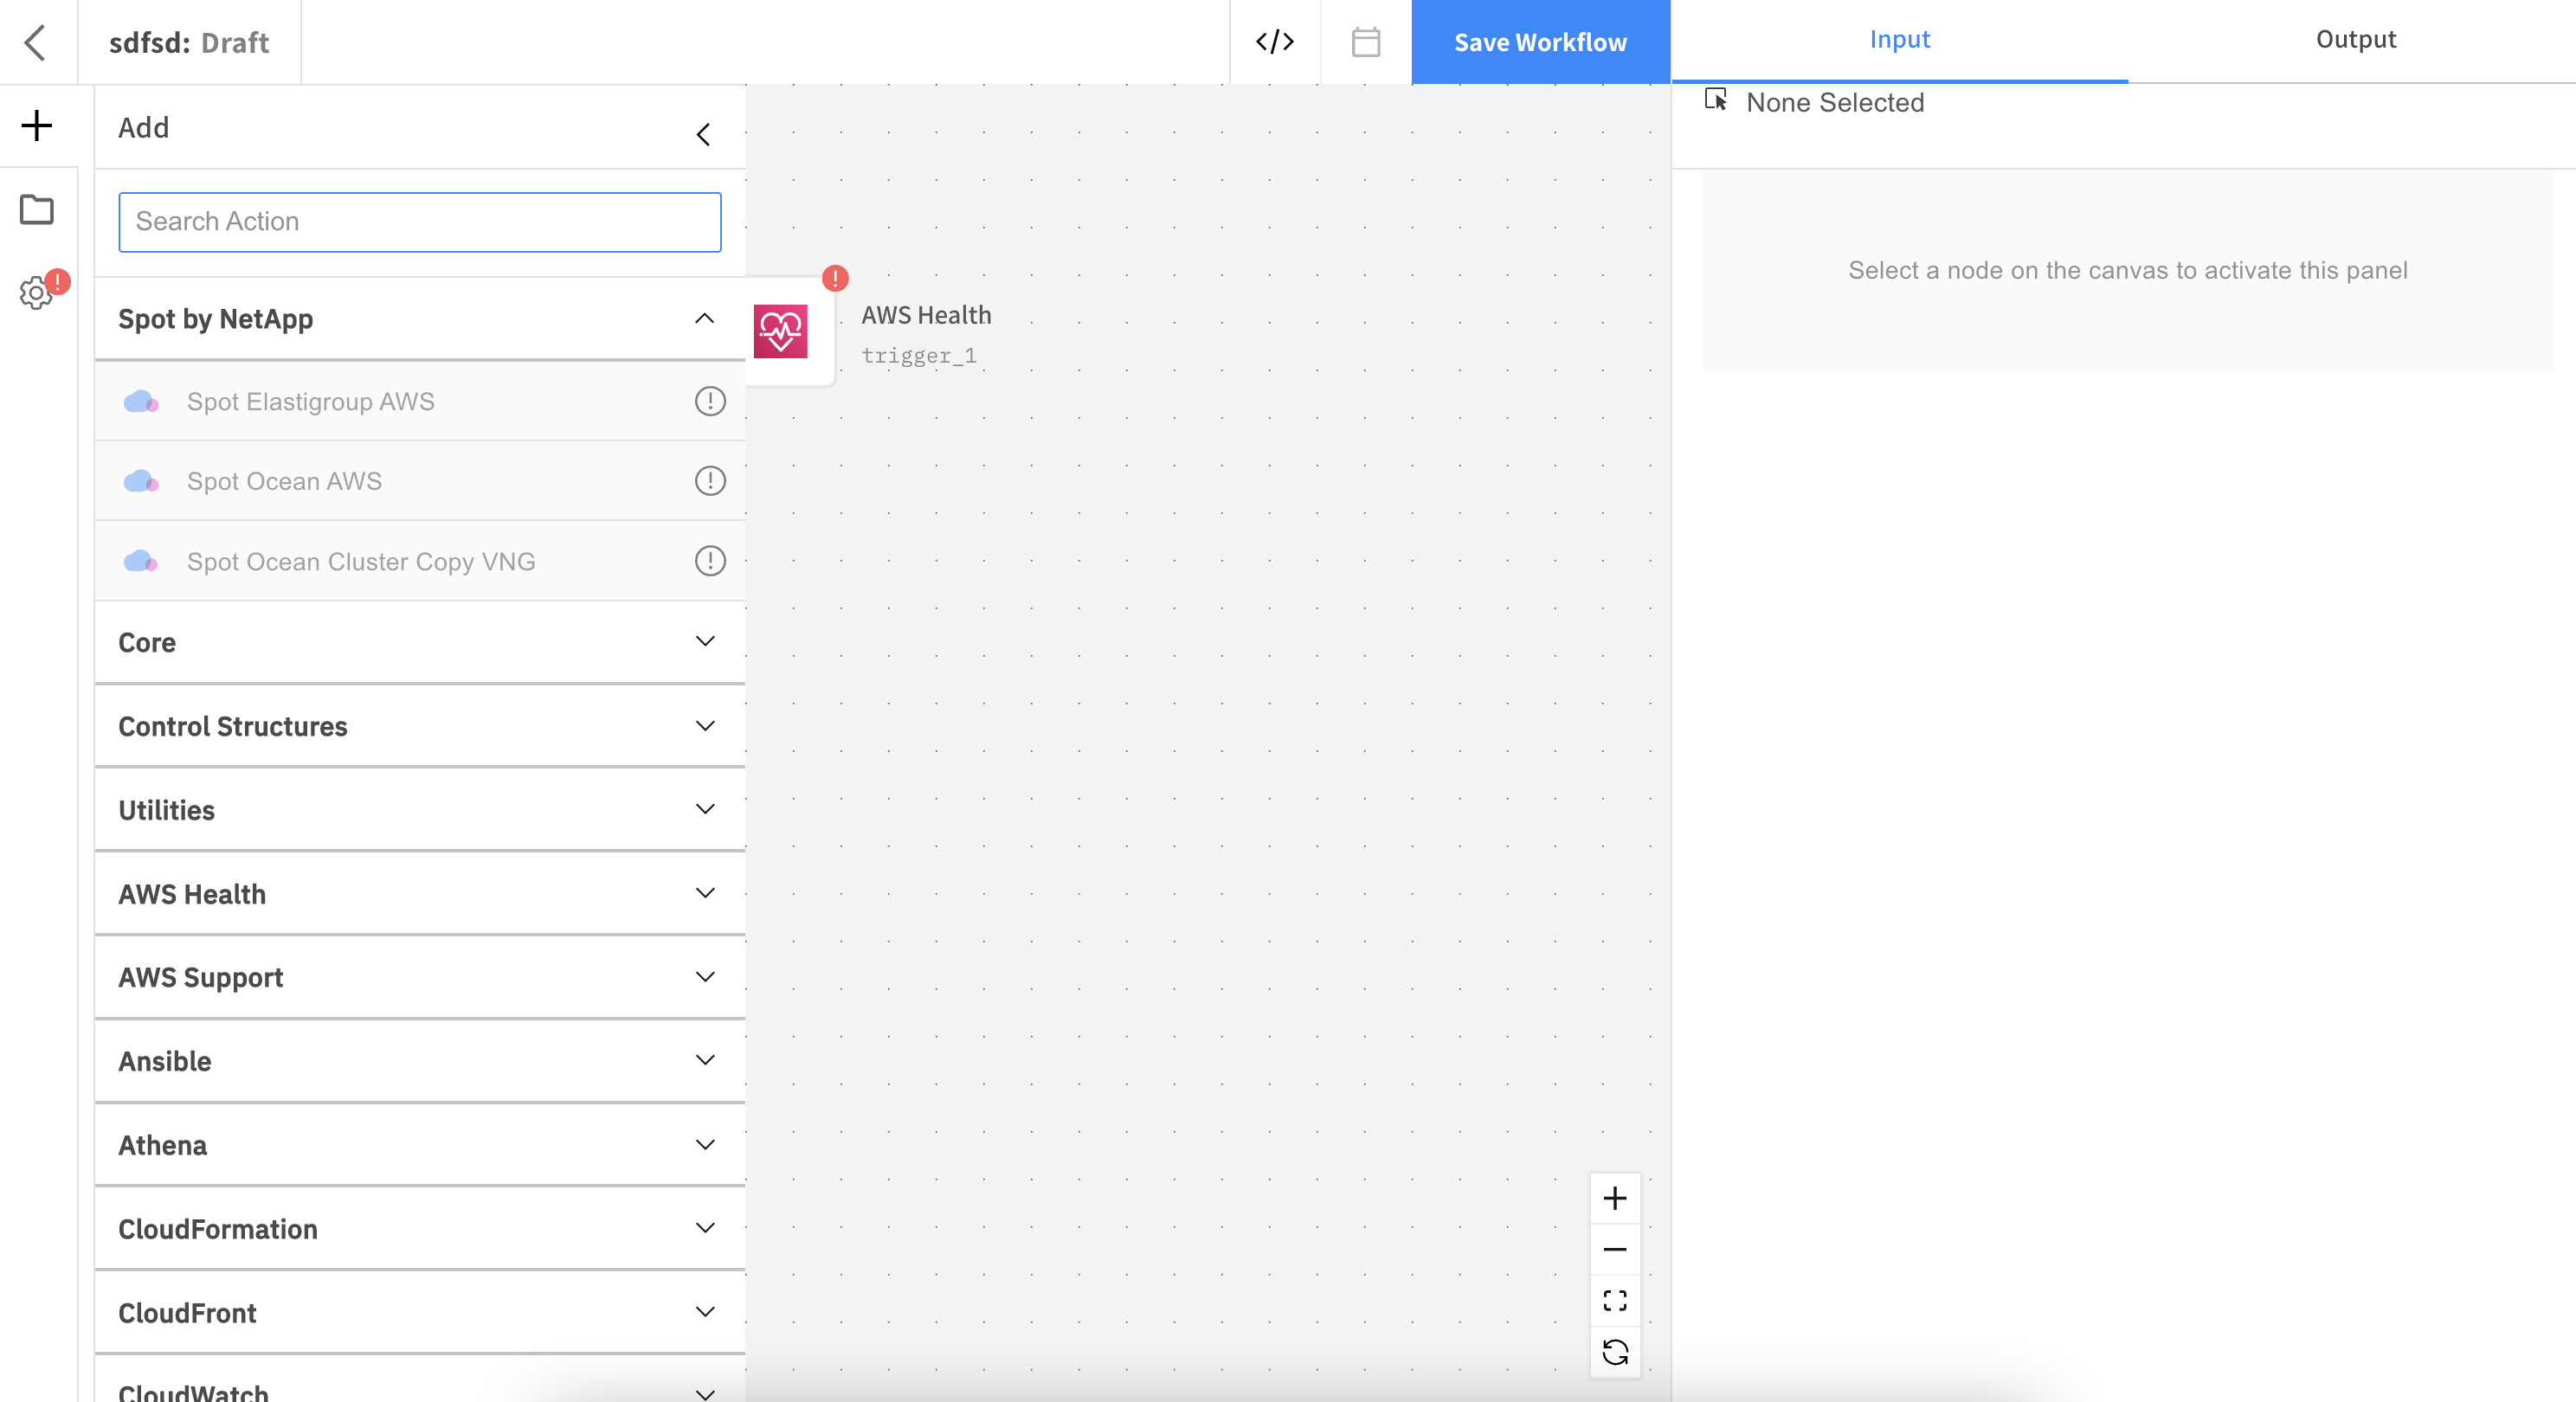
Workflow Editor
The Workflow Editor is the interface where you can create and edit workloads.
- Left Panel – a library of integration actions. Click the + icon in the top left to open and close the library.
- Center Panel – a canvas where you can drag and drop actions to connect them and create a workflow.
- Right Panel – an action configuration panel where you enter the input parameters and explore the output parameters for a particular action that you selected.
Create a Trigger
Every workflow needs a trigger. There are three types of triggers:
- Manual: you can start the workflow immediately after clicking Create Workflow.
- Third-party/ Integration trigger: You can select one of the third-party integrations that are presented in the window in the options. Integrations like AWS Datadog, PagerDuty, etc. are webhook based. For example, when a certain alert is triggered inside PagerDuty, the workflow inside a Spot Connect workflow automatically runs and executes.
- Scheduled: A scheduled run can only be done to a manual trigger. You cannot schedule a workflow to run if it's got a third-party integration trigger, like PagerDuty or Datadog.
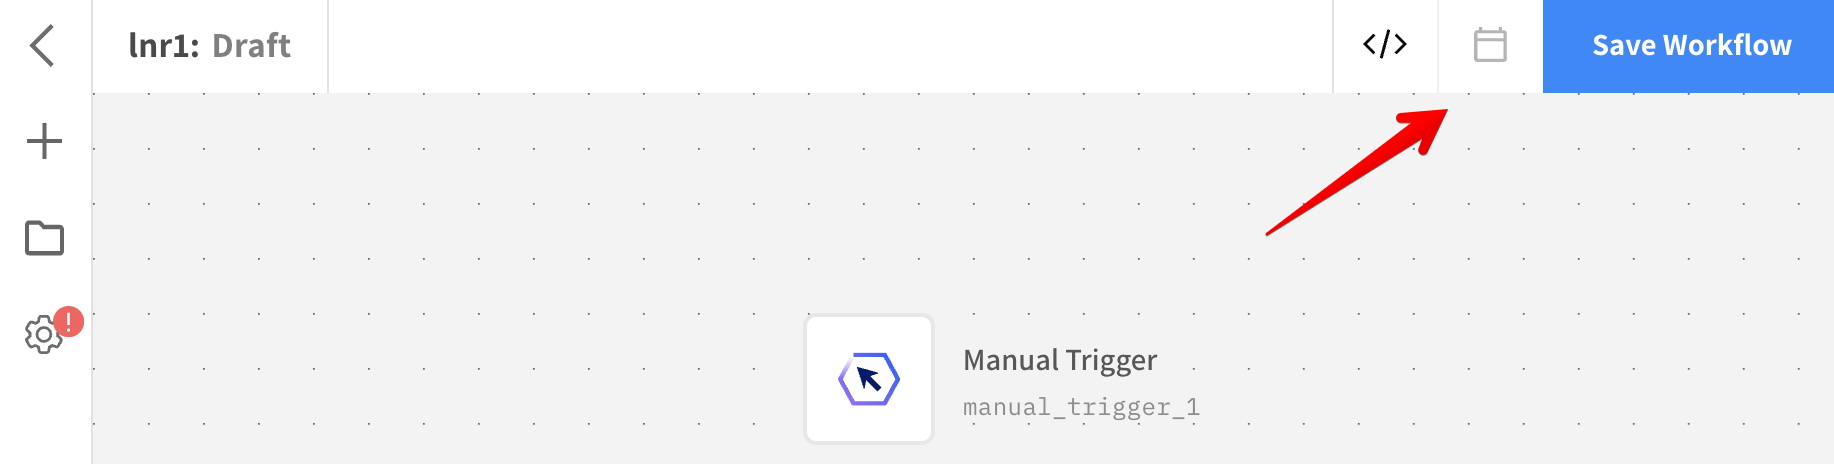
To schedule a workflow run, click the calendar icon on top.
You can schedule the trigger:
-
Fixed rate: you can schedule the frequency you want the trigger to run by scheduling value and the intervals.
-
CRON expression: define with CRON expressions when you want the trigger to run.
To find information of all the scheduled workflows, click Schedules in the Spot Connect main menu on the left and click Schedules. You can enable and disable workflows in this section.
The Rate/Expression column displays the scheduled triggers that were created with a fixed rate or a CRON expression rate. The triggers that were set according to a fixed rate are displayed with a description and the triggers that were set according to a CRON expression are displayed with symbols. Hovering over a trigger that was set with CRON expressions in the Rate/Expression column presents when the next 10 executions will occur.
Configure the Trigger
Configure the trigger in the configuration panel.
Insert the API key that you created prior to creating the workflow. The Webhook API Key Value and the Workflow Webhook URL will be automatically inserted.
Every workflow must have a trigger whether it's manual or it's a third-party integration of your generic web hook.
Change the Trigger
If you selected a manual trigger and you want to change it to a third-party integration, complete the following steps:
- Hover over the trigger and click the edit icon.
- Click the Replace the trigger icon.
- Click the trigger you want and click Update trigger.
Connect an Action Node
An action node is one of the four main components of a workflow and you can find a variety of action nodes in the menu that opens when you click the Add Actions icon on the left. Complete the following steps to add an action node to the workflow:
- Click the Add Actions icon on the left panel. Select an action node in the menu that opens drag it to the canvas.
- Connect the action node to the trigger by hovering over the trigger and drawing a line from the arrow that appears in the trigger to the action node.
Alerts
If a node is not configured it will have an alert. The workflow will not run if an alert appears in the trigger or an action node. In order to remove the alert, click the action and complete the required information in the configuration panel.
The workflow must have a unique name, a trigger and at least one other action node in addition to the trigger action with an edge (a line) connecting the two. All actions or nodes on the canvas must be configured completely in order to save the new version. If one of the components is not completely configured, you will not be able to save the workflow.
When a workflow is saved, you can view the code of the workflow.
Each time you add a new action node, you need to save the new version.
If you do not enter the data in a new action node, you will be prompted to do so when you want to run the workload.
Run the Workflow
When all of the inputs for the specific action are configured and there are no alerts, the workflow can be saved by clicking Save Workflow.
-
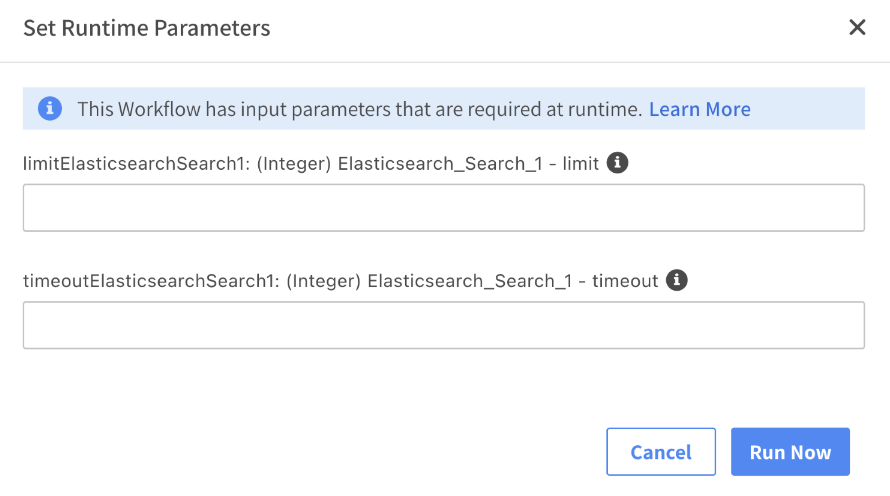
After saving a workflow, click Run Now. A Set Runtime Parameters window opens.
-
Enter the parameters and click Run Now. You will be redirected to the Executions Detail page.
The Executions page provides live updates of the running workflow.
You can add another action node to the canvas. If you decide to add another node to the canvas, you need to click Save New Version after creating and configuring it. This needs to be done for each action node that is added to the workflow. Each change that is made on the canvas needs to be saved by clicking Save New Version.