Connect GCP
This page describes the procedures for manually (using the GCP console) connecting your GCP account to Spot. The procedure assumes that you are following the instructions in the onboarding wizard, have already created your Spot organization, and selected GCP as your cloud provider. You are connecting a linked account, and are now at Step 3.1 as shown below.
Step 3.1: Click Manually
Step 3.2: GCP Login
Log in to the GCP account that you are connecting to Spot. Switch back to the wizard in Spot and click Next.
Step 3.3: Create a new Service Account
In this step you create a service account that Spot will use to manage resources in your GCP account and assign it the role of Editor. Complete this step in the order of the bullets in the wizard.

-
In the GCP console, go to Service Accounts under the project you are connecting to. Click Create a Service Account.
-
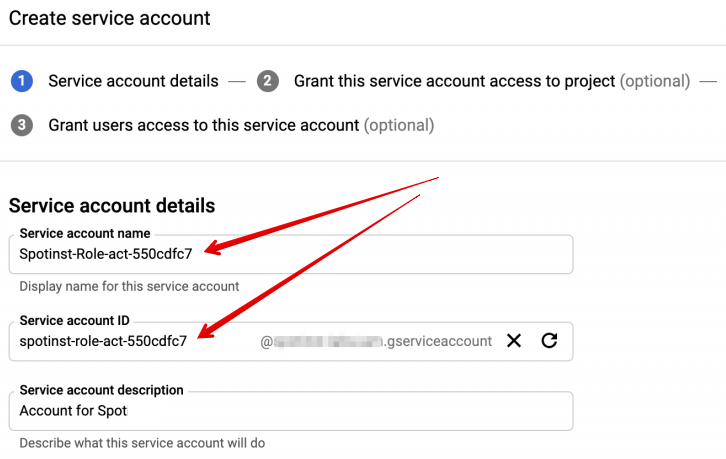
Switch back to the Spot wizard and copy the service account name that has been generated, for example, Spotinst-role-act-550cdfc7.
-
In GCP, paste the name into the Service Account Name and Service Account ID fields. Click Create.
-
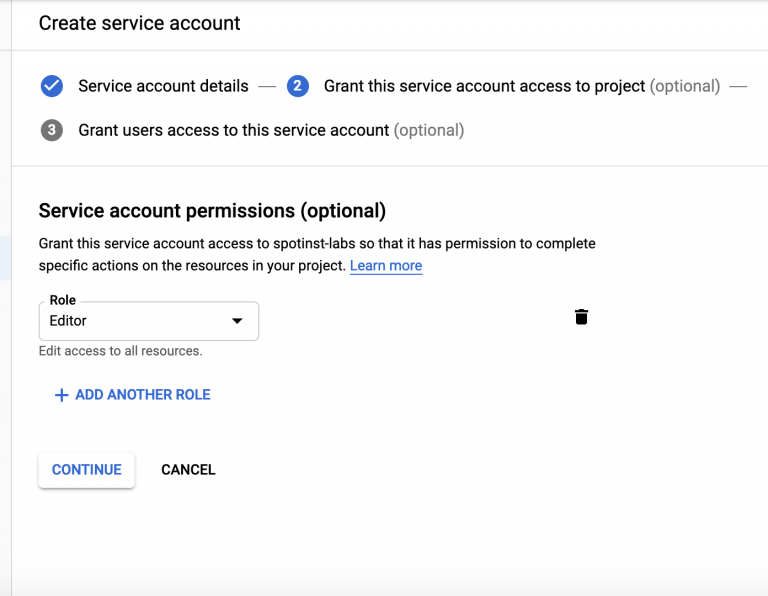
Under Service Account Permissions, choose Editor in the Role dropdown list. This will give the account Editor permissions. Click Continue.
-
Go back to the wizard in Spot and click Next.
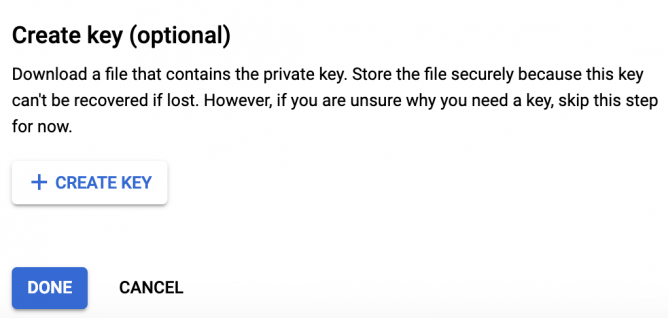
Step 3.4: Create Service Key
In this step, you create a new service key and upload it to the service account you just created.

-
In GCP, navigate according to the path shown above.
-
Once you have created the key, drag and drop the JSON file to Spot, to the area indicated in the wizard.
-
In Spot, click Connect Account.
Spot will display a banner indicating that your GCP account has been connected successfully, and in the Dashboard, you will see important savings and optimization information about your account.