Set up Halyard
This page describes the second part of the Spinnaker integration which includes installing Halyard and setting up Spot as a cloud provider in Spinnaker. Halyard is the configuration service which manages the lifecycle of Spinnaker services.
Complete the following procedures as described below:
- Install Halyard
- Add Spot as a Cloud Provider
- Define Time Zone
- Complete Environment Setup
- Expose Spinnaker
Prerequisite
Before starting the procedures on this page, you must complete the procedures on Set up Environment as Local Git.
Install Halyard
-
Use the commands below to install Git and the Spot environment:
$ git clone https://github.com/spotinst/spinnaker-halyard.git
$ cd spinnaker-halyard
$ git checkout spot_provider
$ ./gradlew halyard-web:run -
If you receive the error: trustAnchors parameter must be non-empty, then run the following commands and try again.
$ /usr/bin/printf '\xfe\xed\xfe\xed\x00\x00\x00\x02\x00\x00\x00\x00\xe2\x68\x6e\x45\xfb\x43\xdf\xa4\xd9\x92\xdd\x41\xce\xb6\xb2\x1c\x63\x30\xd7\x92' > /etc/ssl/certs/java/cacerts
$ /var/lib/dpkg/info/ca-certificates-java.postinst configure -
The halyard service is running and can interact with the halyard client. At the end of this step, verify that you see Started Main as shown below.
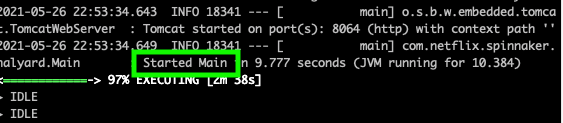
You may see that the execution is less than 100% (as shown above). That is OK. Do not close the terminal window and do not stop the command.
Add Spot as a Cloud Provider
To add Spot to Spinnaker as a cloud provider, complete the steps below.
-
Open a new terminal in addition to the one above (CMD+D) and SSH again.
-
Run the following commands to add Spot as a cloud provider and register to your Spot account:
$ sudo su -
$ cd spinnaker-halyard
$ cd ./halyard-cli
$ make
$ ./hal config provider spot edit --api-token <SPOT_API_TOKEN>
$ ./hal config provider spot account add <SPOT_ACC_NAME> --account-id <SPOT_ACC_ID>
$ ./hal config provider spot enable
Define Time Zone
The default time zone is America/Los_Angeles. If you wish to change the time zone, use the command below to update:
$ ./hal config edit --timezone "TIME_ZONE"
For example, if you wish to change the time zone to UTC, enter:
$ ./hal config edit --timezone "Etc/UTC"
Complete Environment Setup
To finish setting up the environment, complete the following steps:
-
Set up Halyard environment from a local git using the following command:
$ ./hal config deploy edit --type localgit --git-origin-user=spotinst
$ ./hal config version edit --version branch:origin/spot_provider -
Add AWS S3 storage for Halyard config. For more information, see the documentation about Spinnaker and S3.
$ ./hal config storage s3 edit --access-key-id <AWS_ACCESS_KEY> --secret-access-key --region <AWS_REGION>
$ ./hal config storage edit --type s3
Expose Spinnaker
In this procedure you will set up an Nginx reverse proxy to expose Spinnaker externally and then connect to Spinnaker in a web browser. Complete the steps below.
-
If a symlink exists, remove it.
$ unlink /etc/nginx/sites-enabled/default -
Create a file at /etc/nginx/sites-available/reverse-proxy.conf. You can do this using vim or another command.
-
Add the text below to the file you created.
server {
    listen 80;
    location / {
        add_header 'Access-Control-Allow-Origin' '*';
        add_header 'Access-Control-Allow_Credentials' 'true';
        add_header 'Access-Control-Allow-Headers' 'Authorization,Accept,Origin,DNT,X-CustomHeader,Keep-Alive,User-Agent,X-Requested-With,If-Modified-Since,Cache-Control,Content-Type,Content-Range,Range';
        add_header 'Access-Control-Allow-Methods' 'GET,POST,OPTIONS,PUT,DELETE,PATCH';

        proxy_redirect off;
        proxy_set_header host "http://127.0.0.1:9000";
        proxy_set_header X-real-ip $remote_addr;
        proxy_set_header X-forward-for $proxy_add_x_forwarded_for;
        proxy_pass http://127.0.0.1:9000;
    }
} -
Create a symlink to the new file.
$ ln -s /etc/nginx/sites-available/reverse-proxy.conf /etc/nginx/sites-enabled/reverse-proxy.conf -
Restart Nginx.
$ service nginx configtest
$ service nginx restart -
Deploy the Spinnaker configuration for the first time. This command can take several minutes the first time you run it. Ignore the warnings.
$ ./hal deploy apply -
Expose Spinnaker to external access.
$ cd ~/spinnaker-halyard/halyard-cli
$ echo "host: 0.0.0.0" | tee \
    ~/.hal/default/service-settings/gate.yml \
    ~/.hal/default/service-settings/deck.yml
$ ./hal config security ui edit --override-base-url http://<INSTANCE_PUBLIC_DNS_NAME OR IP>:9000
$ ./hal config security api edit --override-base-url http://<INSTANCE_PUBLIC_DNS_NAME OR IP>:8084
$ ./hal config security api edit --cors-access-pattern http://<INSTANCE_PUBLIC_DNS_NAME OR IP> -
Deploy the Spinnaker configuration for the second time.
$ ./hal deploy apply -
(Optional) Verify in the logs that the services are up and running.
- Front50
- Gate
- Clouddriver
- Orca
- Deck
$ cd ~/dev/spinnaker/logs
$ less front50.log
$ less gate.log
$ less clouddriver.log
$ less orca.log
$ less deck.log
Connect to the Spinnaker instance by entering the IP address in the browser.
Now you are ready to start using Elastigroups within the Spinnaker environment and take advantage of all the Spot optimization, scaling, and cost-saving features.